
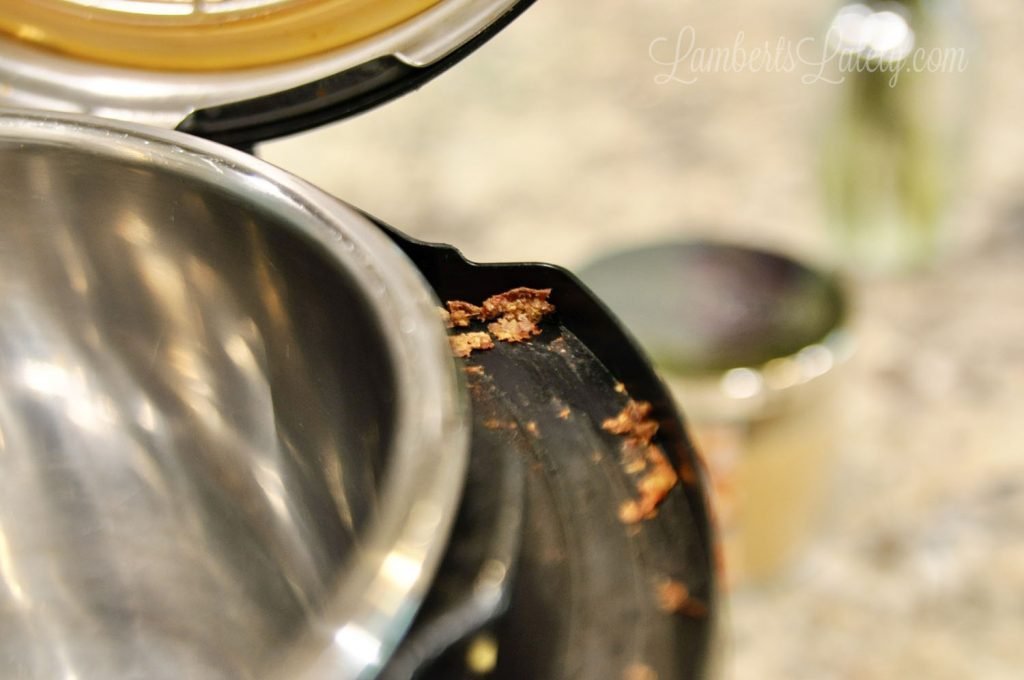
You’ve probably noticed that after a few weeks of braising and — hmm. Let me put it differently, pressure cooking, the underside of your Instant Pot lid starts looking grimy. Not just the obvious ring, but the dark.
Hidden crud around the small metal flap and inside the steam valve. That buildup can silently sabotage your cooker’s performance. If you think about it.
Then again. Learning how to clean instant pot lid properly isn’t just about hygiene. It’s how you prevent the dreaded “burn” errors and steam leaks that ruin dinner.
TL; DR
- Pull out the sealing ring, anti-block shield, and float valve cap every time you wash the lid — food hides behind all of them and will rot.
- Soak the silicone ring in 50% white vinegar or leave it in direct sun for an hour to kill persistent odors that soap cannot remove.
- Use a toothpick wrapped in a cloth to scrape the deep rim track; it’s the single most overlooked spot and causes false sealing.
Key Point– Thesealing ring is the most safety-critical part. If it’s cracked or stretched out of shape, the pot will hiss and fail to pressurize.
- The anti-block shield (that metal mesh cover) pops off stiffly. You’ll need to remove it by hand to clean the starches and fats that clog the steam path.
- White vinegar at 5% acidity is your safest deodorizer — it works better than baking soda pastes for penetrating silicone pores.
- Never lose the float valve’s tiny silicone cap down the drain; it’s too easy to wash away and costs a trip to the replacement parts store.
What You’ll Need
You can deep-clean a lid in about. To be more precise, 20 minutes with stuff you already own. No special gadgets required.
- Warm water with mild dish soap
- White vinegar (standard 5% acetic acid)
- A non-abrasive sponge or soft cloth
- A small, clean toothbrush (dedicated to kitchen use)
- A wooden or plastic toothpick, or a thin foam brush
- A microfiber cloth for drying
- Optional: Bar Keeper’s Friend (if your stainless steel has stubborn marks), and a second sealing ring if you want to color-code for sweet vs. savory.
Caution:
Anything that scratches the 304 stainless steel will eventually trap bacteria. Stick to soft tools.
Step 1: Remove the Inner Lid Components
The first move is to strip the lid down to its bare metal shell so you can get at the spots that sprays and sprays never reach. It takes 30 seconds once you learn the pop-off points.
That’s it. You now have a bare lid. One silicone ring, a metal shield, and a tiny valve cap, so lay them on a dry towel so nothing rolls away.
Does the anti-block shield really need to come off every time?
Yes. Starches from beans and grains cook onto the back of that shield, and enough buildup will block the steam passage.
Even a thin film of dried residue can trigger a false seal and cause the pot to count down without ever reaching full pressure. After a particularly sticky pot of mac and cheese, I found completely dried-on pasta water behind there, soap and a scrubber wouldn’t have touched it.
Step 2: Wash the Stainless Steel Lid
Hand-washing with warm soapy water is the safest route, but the top rack of a dishwasher is fine as long as you keep the heat-dry cycle off. The 304 steel won’t rust, but extreme heat can warp the lid over many cycles.
Now, grab your sponge and wash both sides of the metal lid, which means pay extra attention to the inner rim, that’s. Where the pot’s lip touches the gasket and where dried condensation builds. From what we can tell, if you see white mineral spots (challenging water), a dab of — no. Scratch that, Bar Keeper’s Friend on a damp cloth gently rubbed on the stainless will restore the shine.
As far as I know, and can shorten its lifespan from the expected 18–24 months down to under a year.
Is it safe to put the Instant Pot lid in the dishwasher?
Yes, but only the top rack, and only if you remove the sealing ring and anti-block shield first.
The manufacturer says the lid is dishwasher-safe, but they also recommend hand-washing to extend component life. The metal itself can handle it, but the plastic parts (like the steam release handle) can discolor if exposed to repeated high heat. If you’re cleaning your whole appliance, our full Instant Pot cleaning guide covers the inner pot and base, too.
Step 3: Deodorize and Care for the Silicone Sealing Ring
Silicone absorbs volatile oils from spices and meats. Soap rinsing alone won’t get the curry or chili smell out; you need an acid soak or UV light to drive the odor molecules out of the pores.
Now, mix equal parts warm water, and and white vinegar (5% acidity) in a bowl large enough to submerge the ring. Not exactly what you’d expect. Let that sink in for a second. Let it soak for at least 15 minutes.
For stubborn smells, an hour or overnight soak works even better, so after soaking, rinse thoroughly with water and rub the ring with your fingers under the running stream to feel any remaining slickness. That’s dissolved oil that calls for to be rinsed away.
An even faster trick from kitchen maintenance pros is to place the damp ring in direct sunlight for an hour. UV exposure breaks down the organic compounds causing the odor. I tried this after a batch of garlicky; or at least, chili and the smell was gone by lunchtime.
Color-coding trick: a lot of experienced Instant Pot those using it keep two rings, and one for sweet dishes (yogurt, oatmeal) and one for savory (stews, curries). That prevents your cheesecake from tasting faintly like cumin. The silicone ring lasts 18–24 months depending on use; if it’s stretched.
Kind of surprising, right? Cracked, or won’t stay seated in the lid track, replace it immediately.
“To remove the ‘curry smell’ from the silicone, a high-heat soak or UV exposure from direct sunlight is often more effective than soap alone.” — Kitchen Maintenance Experts
Step 4: Deep-Clean the Anti-Block Shield and Float Valve
These tiny parts trap the most concentrated gunk, and if either clogs, the whole cooker can fail to pressurize or release steam dangerously. Scrub every crevice.
Sure enough. Soak the anti-block shield in warm soapy water for a couple minutes to loosen dried-on film. Then, using a clean toothbrush.
Scrub both sides of the mesh and the plastic frame, so rinse and hold up to the light, if any holes look blocked, a toothpick can dislodge it.
The float valve cap needs equal attention. Run your toothbrush over the inside.
Outside of the silicone sleeve. Dried sugar or starch glues the metal pin in place. When that happens, the pot won’t seal. After washing, slide the cap onto the pin temporarily.
What does that mean in practice? Move it up and down. It should glide freely.
If there’s resistance. Soak the cap alone in hot water for 5 minutes to dissolve hidden syrup.
Rundown: blocksep matters. For more delicate cleaning of tiny objects like this. You can use the same careful scrubbing you’d use to restore a sticky PopSocket, yet both involve getting gunk out of small recesses without damaging the backing.
Step 5: Clean the Lid’s Rim Track and Reassemble
The deepest channel around the lid where the pot rim sits is the final hiding place for greasy condensation and dried food flecks. A regular sponge can’t reach in there, so you’ll need a pointy tool.
Take a wooden toothpick. And wrap a small piece of microfiber cloth around the tip. Run it along the track, pushing firmly enough to lift the brown residue but not so a pain that you scratch the stainless.
In my kitchen. I pull out enough crud to feel equal parts disgusted and satisfied. For longer tracks. From a practical standpoint, a foam brush dipped in warm soapy water works even better.
Taking a step back here, once the track is clean, wipe the entire lid dry with the microfiber cloth. Now reassemble: press the float valve cap back onto the pin (make sure it’s seated all the way down).
Snap the anti-block shield into its slot (listen for the click). And finally stretch the sealing ring back into its groove, working it in all around so it lays flat. Confirm the ring isn’t twisted.
Close the lid and try locking it. If it’s stiff, the ring might be misaligned.
After everything is back together, and i like to run a 5-minute pressure cycle with a cup of water and a splash of vinegar.
This “steam clean” loosens any last grease in the steam pipe. And leaves the pot smelling neutral. It’s not required every time, but it’s a nice reset after a heavy deep clean.
“The sealing ring is critical to safety. If it is cracked, pitted, or damaged, the lid will not seal. Always inspect it after cleaning.” — Instant Brands Support Team
Troubleshooting (Common Mistakes)
Even careful cleaners run into these snags. Here’s how to fix them.
- Lid won’t seal after reassembly. Check that the sealing ring isn’t twisted and that the anti-block shield is fully clicked in. If the ring feels loose, it may have stretched; replace it.
- Odor returns immediately. Soak the ring longer in vinegar, then sun-dry. If it still reeks, that ring is too saturated and needs replacing — silicone eventually holds onto rancid oil permanently.
- Float valve sticks. Remove the silicone cap and soak both in hot soapy water. Use a toothpick to gently scrape any hardened sugar from the metal pin.
- Loud hissing during pressure cooking. The anti-block shield might be missing or misaligned. Without it, steam escapes erratically. Reattach it before cooking.
- Water spots or haze on stainless steel. A tiny dab of Bar Keeper’s Friend on a damp cloth, rubbed in small circles, then rinsed thoroughly, restores the factory finish.
What to Do Next
If you think about it, now that your lid is spotless. You’ll want to keep it that way with minimal effort. Wipe the sealing ring and the underside of the lid with a damp cloth. After each use, even. If you don’t do a full wash. Every month, toss the silicone ring in a vinegar soak to stay ahead of smells.
From a practical standpoint, mark your calendar. The sealing ring’s typical lifespan is 18–24 months. When it starts losing elasticity or holds a permanent funk. (and rightly so) swap it out. For the base and buttons, cleaning your Ninja blender base needs similar attention to tight spots.
You can apply the same toothpick-and-cloth trick there.
People Also Ask
How often should I clean my Instant Pot lid?
Clean the lid after every use with a quick wipe, and perform a full disassembly and deep clean every 5–10 uses.
Starchy or saucy dishes demand immediate attention to prevent buildup in the track. If you notice odors or steam leaks, it’s time.
Why does my Instant Pot lid smell bad even after washing?
Silicone absorbs cooking odors that soap can’t dissolve.
A vinegar soak or sun exposure removes the smell by breaking down the oil compounds. For persistent smells, a dedicated savory-only ring prevents cross-contamination with delicate foods.
Can I use bleach to clean the lid?
No. Bleach can degrade the silicone and leave a residue that transfers into food.
Stick to vinegar, mild dish soap, or food-safe cleansers like Bar Keeper’s Friend. Harsh chemicals compromise the seal’s integrity.
What’s the easiest way to clean the steam release handle?
Pop the handle off (on most models) and rinse it under warm water with a small brush. If yours isn’t removable, use a damp toothbrush scrubbing the openings while tilting the lid so water drains away from the electronics.
🔍 Research Sources
Verified high-authority references used for this article