To clean the sticky side of a screen protector, you need a few household items. These items can help you remove dirt and dust effectively.
Screen protectors keep our devices safe from scratches and dirt. But, over time, the sticky side can gather dust and debris. This makes the protector less effective. Cleaning the sticky side is easy with the right steps. It helps maintain the protector’s stickiness and clarity.
In this guide, you’ll learn simple methods to clean it. Keep reading to discover how to keep your screen protector in top shape.

Credit: www.gazelle.com
Materials Needed
Cleaning the sticky side of your screen protector can be tricky. Using the right materials is crucial to avoid damaging the protector. Here are the materials you will need for this task.
Cleaning Solutions
First, you need the right cleaning solutions. These will help remove dust and grime from the sticky side. Consider using:
- Distilled Water: Regular water contains minerals that may leave residue.
- Isopropyl Alcohol: Use a 70% solution for effective cleaning.
- Screen Cleaner: Commercial screen cleaners are designed for delicate surfaces.
Soft Cloths And Towels
Next, gather some soft cloths and towels. These will help in wiping and drying the screen protector without causing scratches. Use:
- Microfiber Cloths: These are gentle on the surface and reduce the risk of scratches.
- Lint-Free Towels: These prevent lint from sticking to the protector.
Tools For Reapplication
Finally, you need some tools for reapplication. These will help you place the screen protector back onto your device smoothly. Consider using:
- Plastic Card: A credit card can help remove air bubbles.
- Dust Removal Stickers: These can lift dust particles before reapplying the screen protector.
- Application Kit: Some screen protectors come with an application kit. Use it if available.
Preparation Steps
Cleaning the sticky side of your screen protector requires careful preparation. Proper steps ensure the screen protector remains functional and effective. Let’s break down the preparation process into simple, manageable tasks.
Removing The Screen Protector
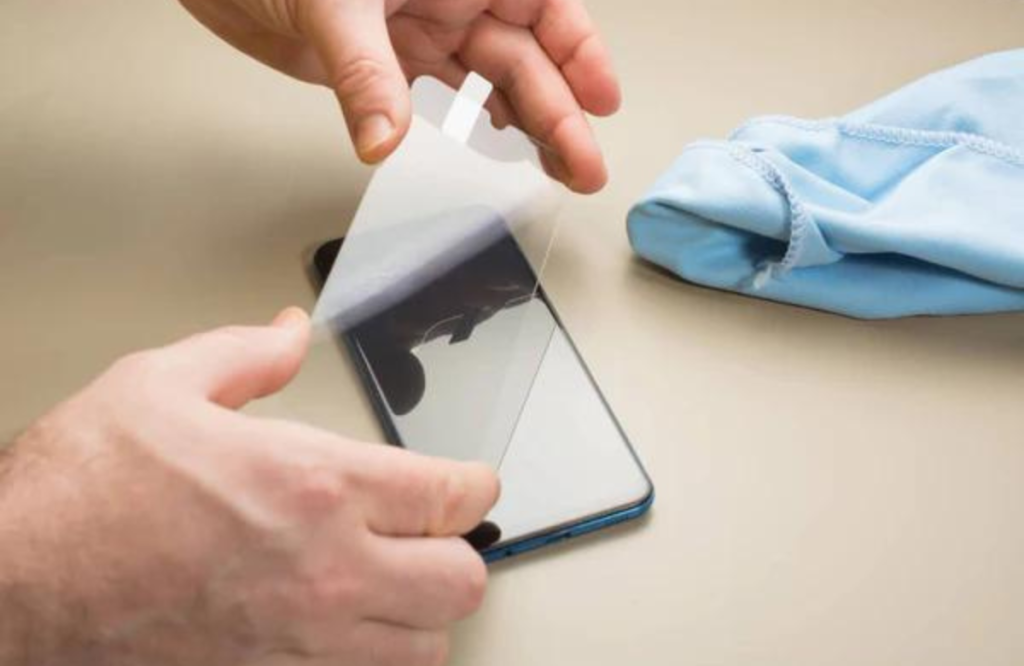
First, gently peel off the screen protector from one corner. Use a credit card or fingernail to lift the edge. Slowly lift the protector to avoid bending. Place it sticky side up on a clean surface.
Setting Up A Clean Workspace
Next, prepare a clean workspace. Use a microfiber cloth to wipe the area. Ensure the table is free from dust and debris. Lay down another microfiber cloth as a base. This will prevent the sticky side from picking up dirt.
Gather your cleaning tools:
- Microfiber cloth
- Distilled water
- Isopropyl alcohol (optional)
- Spray bottle
Fill the spray bottle with distilled water. Add a few drops of isopropyl alcohol if needed. Shake gently to mix. Your clean workspace is now ready for the next steps.
Cleaning Process
Cleaning the sticky side of a screen protector can be a delicate task. Dust, dirt, or fingerprints can affect its adhesive quality. Follow these simple steps to ensure a clean, sticky surface.
Applying The Cleaning Solution
Start by preparing a mild cleaning solution. Mix a few drops of dish soap with warm water. Do not use harsh chemicals. These can damage the adhesive. Dip a soft cloth into the solution. Wring out excess liquid. The cloth should be damp, not wet.
Wiping The Sticky Side
Gently wipe the sticky side of the screen protector. Use a circular motion. This helps remove dirt without spreading it. If you encounter stubborn spots, apply a bit more pressure. Be careful not to stretch or tear the protector. Rinse the cloth in clean water. Wipe the sticky side again to remove any soap residue. Finally, let the screen protector air dry. Do not use a towel, as it might leave lint.

Credit: www.gazelle.com
Drying And Inspection
Drying and inspecting the screen protector after cleaning is crucial. Proper drying ensures no moisture remains. Inspection guarantees the sticky side is residue-free. This step is vital for the protector’s effectiveness and longevity.
Air Drying Techniques
Air drying is the safest method. Place the screen protector on a clean surface. Ensure the sticky side faces up. Use a dust-free area to avoid particles sticking to it. Let it sit undisturbed for an hour.
If time is limited, use a cool fan. Position the fan to blow air gently over the protector. Avoid using heat, which can damage the adhesive. Patience here leads to better results.
Checking For Residue
Inspect the screen protector under good lighting. Look for any leftover residue. Residue can affect the stickiness and clarity.
If residue is present, use a lint-free cloth. Gently wipe the sticky side. Avoid using harsh chemicals. These can damage the adhesive and reduce effectiveness.
Once clean, the screen protector is ready for reapplication. Ensure your device’s screen is also clean. This prevents dust or particles from getting trapped.
Reapplying The Screen Protector
Reapplying your screen protector after cleaning its sticky side can seem tricky. But with the right steps, it is straightforward. Ensuring a clean, dust-free surface is crucial. This will help in achieving a smooth finish and optimal screen protection.
Positioning Correctly
Begin by holding the screen protector by its edges. Align it with your device’s screen. Make sure the cutouts for the camera and speakers are accurate. This initial alignment is vital for a perfect fit.
Lower the protector slowly onto the screen. Start from one edge and move to the other. This helps in avoiding misalignment and reduces the chance of trapped dust particles.
Smoothing Out Air Bubbles
Once the protector is in place, use a credit card or a similar tool. Start smoothing from the center of the screen. Push out any air bubbles towards the edges. Take your time with this step. Rushing can leave unsightly bubbles under the protector.
If you encounter stubborn bubbles, lift the protector gently. Reapply while pushing out the air. This ensures a clear, bubble-free surface.
For smaller bubbles, use a soft cloth to press them out. Gently rub in circular motions until they disappear.
By following these steps, your screen protector will be securely reattached. Your device will look as good as new.

Credit: cellprosfresno.com
Maintenance Tips
Keeping your screen protector clean ensures clear visibility and extended lifespan. A few simple tips can make a big difference. Regular maintenance is key. Below are some easy-to-follow tips for maintaining your screen protector’s sticky side.
Regular Cleaning Schedule
Create a routine for cleaning your screen protector. Clean it weekly to prevent dirt build-up. Use a soft microfiber cloth. Avoid harsh chemicals. These can damage the sticky side. Gently wipe the screen protector. Remove dust and fingerprints. This helps maintain its clarity and stickiness.
Protective Measures
Take steps to protect your screen protector. Avoid touching the sticky side. Oils from your fingers can reduce stickiness. Store your device in a clean, dry place. Use a phone case to keep dirt away. This reduces the need for frequent cleaning. Handle your device with care. Avoid dropping or scratching the protector.
Troubleshooting
Cleaning the sticky side of a screen protector can be tricky. Sometimes, you may encounter stubborn stains or decide it’s time for a new one. This section will guide you through these common issues.
Dealing With Stubborn Stains
Stubborn stains on the sticky side can be frustrating. Follow these steps to tackle them effectively:
- First, mix a small amount of water with mild soap.
- Dip a soft cloth into the soapy water.
- Gently rub the stained area in circular motions.
- Rinse the cloth with clean water and wipe the area again.
- Allow the screen protector to air dry completely before reapplying.
If stains persist, consider using a screen cleaning solution. Apply a small amount to a microfiber cloth and repeat the steps above. Avoid using harsh chemicals to prevent damage.
When To Replace The Screen Protector
Knowing when to replace your screen protector is essential. Here are some signs:
| Sign | Description |
|---|---|
| Visible Scratches | Deep or numerous scratches can affect visibility. |
| Loss of Adhesion | If the protector no longer sticks well, it’s time to replace it. |
| Discoloration | Yellowing or other color changes indicate wear. |
| Reduced Sensitivity | If touch response is poor, replace the protector. |
Replacing your screen protector can ensure your device stays protected and functions well. Keep an extra protector handy for quick replacements.
Frequently Asked Questions
What Is The Best Way To Clean A Screen Protector?
Use a microfiber cloth and a mild cleaner. Gently wipe the sticky side.
Can I Use Water To Clean The Sticky Side?
Yes, water can clean the sticky side. Avoid soaking it. Just a damp cloth.
How Do I Remove Dust From The Sticky Side?
Use a dust removal sticker or tape. Press and lift gently.
Will Alcohol Damage My Screen Protector?
Yes, alcohol can damage it. Use mild, alcohol-free cleaners instead.
How Often Should I Clean My Screen Protector?
Clean it once a week. This keeps it clear and free of smudges.
Conclusion
Cleaning the sticky side of a screen protector is simple. Follow the steps. Start by gently removing the protector. Use a mild soap solution. Clean the sticky side with a soft cloth. Rinse thoroughly with water. Let it air dry completely.
Reapply the screen protector carefully. This keeps your device looking new and scratch-free. Regular cleaning extends the life of your screen protector. No need to replace it often. Happy cleaning!
