Table of Contents
Cleaning the inside of a fuel tank is essential. It helps maintain your vehicle’s performance.
Keeping your fuel tank clean prevents contamination and improves fuel efficiency. Dirt and debris in your fuel tank can cause engine problems over time. Regular cleaning can save you from costly repairs. In this guide, you will learn how to clean the inside of a fuel tank effectively.
We will cover the necessary steps, tools, and safety measures. Cleaning your fuel tank might seem like a daunting task, but with the right approach, it becomes manageable. Understanding the process will help you maintain your vehicle’s longevity and performance. So, let’s dive into the steps to keep your fuel tank clean and your engine running smoothly.
Safety Precautions
Cleaning the inside of a fuel tank is a crucial task. It can ensure the optimal performance of your vehicle. Safety should be your top priority. Let’s discuss the essential safety precautions to follow.
Personal Protective Equipment
Always wear the right personal protective equipment (PPE). Use gloves to protect your hands. Fuel and chemicals can irritate your skin. Wear safety goggles to shield your eyes from splashes. A face mask is vital. It prevents you from inhaling harmful fumes. Coveralls protect your body. They also keep your clothes clean.
Fire Safety Measures
Fuel is highly flammable. So, work in a well-ventilated area. Keep fire extinguishers nearby. Ensure there are no open flames or sparks. Avoid smoking or using electrical tools that can produce sparks. Ground yourself to avoid static electricity. Remember, safety first.
Preparation
Cleaning the inside of a fuel tank requires proper preparation. Taking the time to prepare will ensure a smooth and effective cleaning process. Follow these steps to get started.
Gather Necessary Tools
First, gather all the necessary tools. You will need wrenches, screwdrivers, and pliers. Have a siphon pump and a container for draining fuel. Get a fuel tank cleaning solution and a brush. Lastly, have protective gloves and goggles ready.
Drain Remaining Fuel
Next, drain any remaining fuel from the tank. Use a siphon pump to transfer fuel into a safe container. Make sure the tank is empty before you start cleaning. This step is crucial for safety and efficiency.
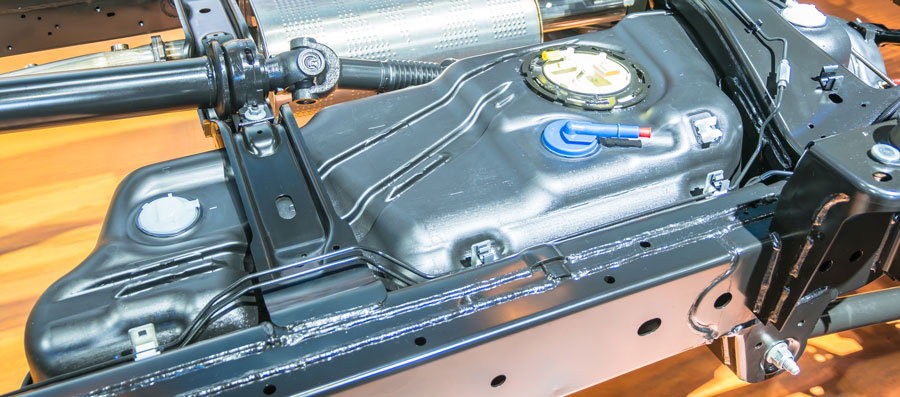
Accessing The Fuel Tank
Accessing the fuel tank of your vehicle is essential for maintenance. Cleaning the inside can improve performance and extend the life of your car. Before you start, gather all necessary tools and take safety precautions. This includes wearing gloves and working in a well-ventilated area.
Removing The Fuel Tank
First, ensure the vehicle is on a flat surface. Use a jack to lift it if needed. Locate the fuel tank, usually at the rear of the car. Disconnect the battery to avoid any sparks. Next, drain any fuel left in the tank. Use a siphon pump for this task. Then, unbolt the straps or brackets holding the tank. Carefully lower the tank to the ground. Ensure you have a helper if the tank is heavy.
Opening The Fuel Tank
Once the tank is removed, place it in a clean workspace. Locate the fuel pump assembly on the top of the tank. Remove the screws or bolts securing the assembly. Lift the pump out carefully. Now, you can open the tank completely. Inspect the inside for any debris or rust. Use a flashlight for a better view. You are now ready to clean the tank thoroughly.
Cleaning Process
Cleaning the inside of a fuel tank is crucial for maintaining vehicle health. A clean fuel tank ensures the engine runs smoothly. Dirt and debris can clog the fuel system. This can lead to performance issues. Follow this cleaning process to keep your fuel tank in top condition.
Scraping And Brushing
First, remove the fuel tank from the vehicle. This step allows for a thorough cleaning. Use a scraper to remove any large debris. Focus on the bottom of the tank. This is where most debris collects. Next, use a stiff brush to scrub the tank’s interior. This will help dislodge any remaining particles. Be gentle to avoid damaging the tank.
Using Cleaning Solutions
After scraping and brushing, apply a cleaning solution. Choose a cleaner designed for fuel tanks. Pour the solution into the tank. Let it sit for the recommended time. This will help break down any residue. Shake the tank gently to ensure the solution reaches all areas. After the solution has worked, drain the tank. Rinse it thoroughly with clean water. Ensure no cleaner remains. This step is vital for preventing fuel contamination.
Rinsing And Drying
Cleaning the inside of a fuel tank involves several crucial steps. Rinsing and drying the tank are important phases. These steps ensure that no debris or moisture remains. Proper rinsing and drying keep the tank in good condition.
Rinsing The Tank
Begin by draining any remaining fuel from the tank. Use a siphon pump for this task. Next, fill the tank with a cleaning solution. A mixture of water and mild detergent works well. Swish the solution around to loosen dirt and residue. Empty the tank and repeat the process if needed. Rinse with clean water until no soap remains.
Drying Techniques
After rinsing, remove as much water as possible. Use a clean cloth to wipe the interior. Place the tank in a well-ventilated area. Allow air to circulate inside the tank. Use a hairdryer or a fan to speed up the drying process. Ensure the tank is completely dry before refilling with fuel.
Inspecting The Tank
Before cleaning the inside of your fuel tank, it’s crucial to inspect it. A thorough inspection helps you identify any issues that may need attention. It also ensures the tank is clean and safe for use. Follow these steps to make sure your fuel tank is in good condition.
Checking For Damage
First, check the tank for any visible damage. Look for cracks, dents, or rust. These can cause leaks or contamination.
- Look at the seams and joints.
- Inspect the fuel lines connected to the tank.
- Examine the fuel cap and its seal.
If you find any damage, consider repairing or replacing the tank. A damaged tank can lead to fuel leaks and potential hazards.
Ensuring Cleanliness
Next, ensure the inside of the tank is clean. Remove any debris or dirt that could contaminate the fuel.
- Empty the tank completely.
- Use a flashlight to inspect the interior.
- Look for any residue or buildup.
Use a clean cloth or brush to wipe away any dirt. If the tank is heavily soiled, consider using a fuel tank cleaner. This will help remove stubborn deposits and ensure the tank is spotless.
Remember, a clean fuel tank ensures optimal performance and longevity of your vehicle. Regular inspections and cleaning will help you avoid potential issues down the road.
Reassembly
Reassembly is the final step in cleaning your fuel tank. Ensuring proper reassembly is crucial for optimal performance. Follow these steps carefully to avoid any issues.
Reinstalling The Fuel Tank
First, position the fuel tank back in its original place. Align it with the mounting brackets. Ensure all connections are secure. Use the correct tools to tighten the bolts and screws. Double-check each connection for stability. This step is vital to prevent leaks.
Next, reconnect the fuel lines. Make sure they fit snugly. Avoid over-tightening them. This can cause damage. Once connected, inspect them for any signs of wear or tear. Replace any damaged parts immediately.
Refilling With Fresh Fuel
With the fuel tank securely in place, it’s time to refill it. Use clean, fresh fuel to avoid contamination. Pour the fuel slowly to prevent spills. Fill the tank to the recommended level. Overfilling can cause problems.
After refilling, inspect the fuel cap. Ensure it is tightly sealed. A loose cap can lead to fuel evaporation. This affects the efficiency of your engine. Finally, start the engine to check for any leaks. Listen for any unusual noises. If everything sounds and looks good, your fuel tank cleaning is complete.
Maintenance Tips
Keeping the inside of your fuel tank clean is crucial for vehicle performance. A clean tank prevents contamination and ensures a smooth ride. Here are some essential maintenance tips to help you out.
Regular Inspections
Inspect your fuel tank regularly. Check for dirt, rust, and water. Look for any signs of damage or leaks. Regular inspections help you catch problems early. This can save you from costly repairs.
Preventive Measures
Use high-quality fuel. Cheap fuel can contain impurities. These can clog your fuel tank. Also, keep your fuel tank full. This reduces the chance of moisture buildup. Moisture can lead to rust and other issues.
Frequently Asked Questions
How Often Should You Clean A Fuel Tank?
Clean your fuel tank every 1-2 years. This prevents build-up and ensures optimal performance.
What Tools Are Needed To Clean A Fuel Tank?
You need a fuel tank cleaning kit, brush, siphon pump, and safety gear. Simple tools for effective cleaning.
Can I Clean A Fuel Tank Myself?
Yes, you can clean it yourself. Follow safety guidelines and step-by-step instructions for a thorough job.
What Are Signs A Fuel Tank Needs Cleaning?
Look for signs like engine sputtering, poor fuel efficiency, or unusual noises. These indicate a dirty tank.
Is Professional Cleaning Of A Fuel Tank Necessary?
Not always. DIY cleaning works well for maintenance. But, seek professional help for severe contamination.
Conclusion
Cleaning your fuel tank is essential for your vehicle’s health. Regular maintenance prevents clogs and ensures smooth performance. Follow the steps outlined for best results. Use proper tools and take safety precautions. Your vehicle will thank you with better efficiency.
Keeping a clean fuel tank also extends its lifespan. Remember, a clean tank means fewer problems on the road. Stay proactive and keep your vehicle in top shape. Happy driving!