
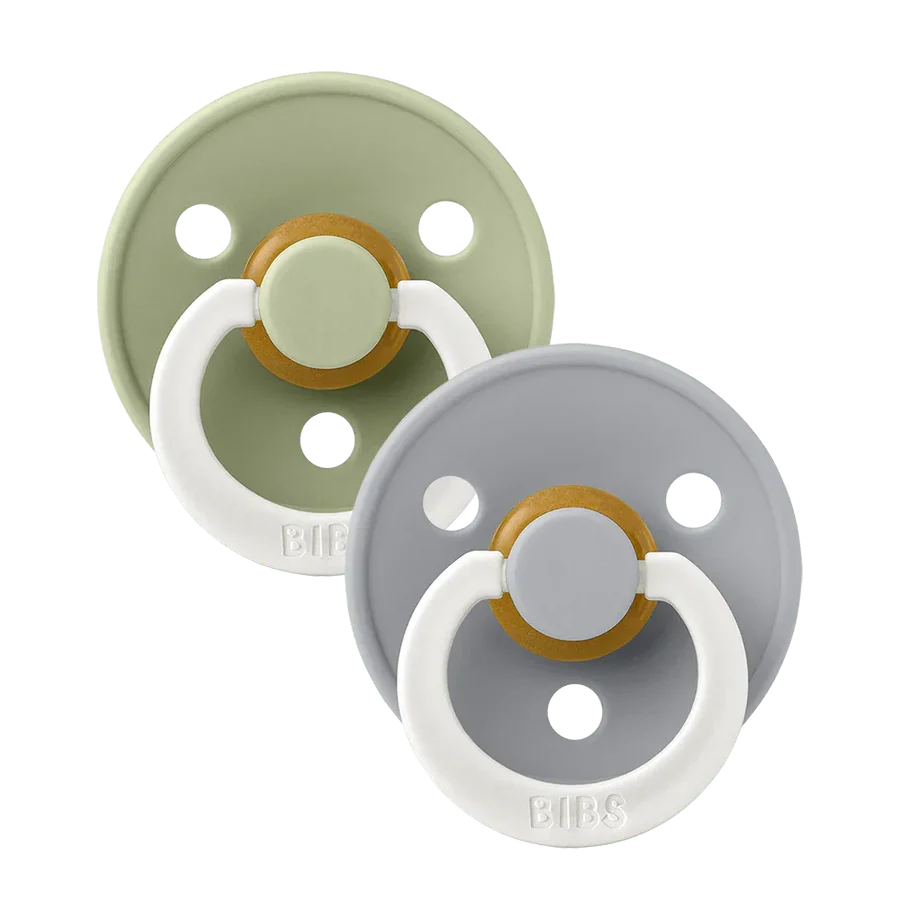
You’ve probably heard that cleaning a BIBS pacifier is just “rinse and boil” — direct, right? Until you notice the nipple getting cloudy, sticky.
Or weirdly swollen, and you wonder if you’ve already ruined it. The distinctive natural rubber latex nipple behaves nothing like regular silicone binkies, so parents end up trashing pacifiers way too early simply mostly since they didn’t know the one little trick that prevents water damage. No dishwasher, no steamer, and absolutely no microwave. Let’s fix that.
TL; DR
- For latex BIBS pacifiers, pour boiling water over them in a bowl (don’t boil directly) and soak for exactly 5 minutes, then squeeze the nipple firmly to expel trapped water.
- Replace pacifiers every 4–6 weeks because the natural rubber expands with use, even if you clean them religiously.
- Daily cleaning is non-negotiable for infants under 6 months — their immune systems rely on true sterilization, not just a quick rinse.
Key Takeaways
- The only safe method for latex BIBS nipples is scalding with boiling water — no dishwashers, steam sterilizers, or UV light.
- Soaking longer than 5 minutes may swell the rubber, and that swelling doesn’t reverse.
- Squeezing the nipple after cleaning is the step almost nobody talks about, yet it’s what prevents mold and the cloudy look that makes parents panic.
- Always check for blanching, stickiness, or a nipple that’s twice its original size — those are clear signals it’s time for a new one.
What You’ll Need
For cleaning, you won’t need any expensive sterilizing gizmos.
Here’s exactly what to grab:
- A clean heatproof bowl (ceramic or stainless steel)
- Kettle or pot to boil water
- Tongs or a slotted spoon (to avoid burning your fingers)
- Clean kitchen towel or paper towels
- Drying rack (optional, but helps with airflow)
- Your BIBS pacifier(s) — obviously
100%
5 min
4–6 wks
| Factor | Natural Rubber Latex | Food-Grade Silicone |
|---|---|---|
| Cleaning method | Scald only (pour-over boiling water) | Scald or dishwasher top rack |
| Max soak time | 5 minutes | Up to 10 minutes |
| Dishwasher safe | 🚫 No — damages nipple | ✅ Yes (top rack) |
| UV sterilizer | 🚫 Makes rubber brittle | Safe (low risk) |
| Replacement | Every 4–6 weeks | Every 8–10 weeks |
The shield and ring are made from approximately 100% food-safe polypropyleneand can handle heat much better, but the real challenge is the nipple itself. Natural rubber latex is a “living” material, as the BIBS safety team describes it. Leave it in hot water too long, and it swells. Blast it with UV light, and it turns gummy. Once you know how to handle that, everything becomes simple.
Step 1: Boil Water and Prepare Your Bowl
Place your pacifiers in a clean bowl, bring fresh water to a rolling boil in a kettle or pot, then remove it from the heat for 30 seconds before pouring.
Never drop the pacifier directly into a pot of actively boiling water, the violent bubbling smashes the soft latex against the hot metal and causes surface damage you can’t fix.
I personally pretty much always let the water sit about 30 seconds after boiling. The water is still at roughly 100°C. The surface doesn’t jump and splash as much. From a practical standpoint, sounds trivial, but it prevents those tiny burns on your fingers later.
Step 2: Pour Boiling Water Over the Pacifiers
Carefully pour the just-boiled water directly over the pacifiers until they’re fully submerged, then set a timer for exactly 5 minutes, no more, no less.
This scalding method kills bacteria without the harsh agitation of a rolling boil, which preserves the nipple’s shape and texture.
Now, some guides say you can boil pacifiers in a pot. For silicone — maybe, and honestly, but natural rubber latex reacts to direct pot heat by blanching, developing a sticky surface film, or swelling unevenly. I’ve watched a brand-new BIBS turn noticeably larger after just one confused 10-minute boil.
Why does this matter? The pour-over method is genuinely the only safe path — the BIBS team itself recommends this approach because it’s gentle yet hot enough to meet European safety standard EN 1400+A2 hygiene needs.
Why can’t I put latex pacifiers in the dishwasher?
The high heat, and harsh detergents inside a dishwasher strip natural oils from the rubber. Causing it to crack or become brittle within days. Plus, the high-pressure water jets can force water deep into the vented nipple where it stays trapped, creating an environment for mold, exactly what you’re trying to avoid.
Step 3: Soak for 5 Minutes — Set a Timer
After 5 minutes of soaking with the lid or a plate loosely on top to keep the heat in, you can use tongs to lift one pacifier out.
Check the water temperature — if it’s still very hot, wait a few more seconds. The latex will be soft, so handle gently.
Taking a step back here. That swelling gets mistaken for “wearing out” early, but it’s really just waterlogging, and according to BIBS, natural rubber expands over time with regular use. Cleaning, which is why the replacement cycle is only 4 to 6 weeks, but over-soaking can accelerate that growth to the point where the pacifier no longer fits comfortably in your baby’s mouth.
Treat the timer like it’s law.
Right, if you’ve been cleaning other baby gear, like a car seat take advantage of. Or sterilizing a Baby Brezza, you know over-heating sensitive materials pretty much always causes trouble. Not everyone sees it that way, though. It’s the same principle — gentle heat, brief contact. As it turns out; (Speaking of which — many parents find similar caution matters.
Step 4: Squeeze the Nipple to Remove Trapped Water
This is the step BIBS owners on Reddit obsess over, and for good reason — the vented nipple design that lets air out during sucking also lets water in during cleaning.
Right after removing the pacifier from the hot water (and while it’s still warm but touchable), pinch the nipple firmly between your thumb and forefinger. Squeeze from the base upward to force any trapped water out through the tiny vent hole.
On the surface, looking at this from another angle, you’ll see a fine mist or a small squirt of water come out, maybe with some residual steam. Now, do this 2 or 3 times for each pacifier.
Never skip it; that trapped moisture is what causes the “cloudy” appearance many parents see — it’s just water vapor inside the silicone or latex walls. Opinions differ on this one. Plus, opinions differ on this one, so what’s the catch? If left sitting, that same water can turn into mold spots by the next day, especially in humid bathrooms.
Here’s the thing – i’ve personally opened a pacifier. After what I thought was a thorough clean, and found a tiny droplet still hiding in the tip. It’s frustrating, but a reliable habit of squeezing solves it.
If you use a baby sterilizer like the Brezza. You’ve likely dealt with residual moisture in containers afterward, and the same drying diligence applies.
Step 5: Air Dry Completely Before Storage
Place the squeezed pacifiers on a clean towel or a drying rack with the nipple facing down so any remaining moisture can drip out. Don’t wipe the latex with a cloth — the friction can leave lint or micro-scratches where bacteria can hide. Let them air dry for at least 20–30 minutes.
In most scenarios, generally speaking, but the little crevices around the ring, and the vent hole need airflow. Perhaps. Once completely dry, store pacifiers in a clean, covered case or the original BIBS box (which is vented. By the way — so it’s not airtight and allows some circulation). If you toss a still-damp pacifier into a sealed container. You’ll get that distinctive sour smell in no time.
Circling back for a moment, for infants under 6 months, the Mayo Clinic — to be more precise, Health Information stresses that sterilization should be done daily. Let that sink in for a second. Meaning you’ll be doing this routine often. Having a small designated drying station on your kitchen counter (and rightly so) saves a lot of hassle.
- Gather a clean bowl and freshly boiled water — let the water cool for 30 seconds to avoid splashing.
- Submerge pacifiers entirely — pour slowly, then cover loosely with a plate to trap heat.
- Set a 5-minute timer — do not walk away; over-soaking ruins latex permanently.
- Squeeze each nipple firmly — force all trapped water out through the vent hole until you see no drops.
- Air dry completely — position nipple-down and wait at least 20–30 minutes before storing.
Troubleshooting: Common Cleaning Mistakes
The Cloudy Nipple Panic
When you hold a cleaned BIBS up to the light, and it looks murky or white-streaked inside. It’s almost certainly just trapped water vapor. Squeeze it again — which is why if the cloudiness doesn’t clear, soak it in fresh boiled water for 3 minutes, then squeeze more aggressively.
If that fails, the nipple may have been left wet too long, and developed micro-cracks, replace it.
Sticky or Gummy Texture After Cleaning
UV sterilizers are the usual villain here. The thing is, and let me tell you, the concentrated light breaks down the natural rubber proteins, leaving a sticky film.
Or it could be residue from harsh dish soap that wasn’t fully rinsed. Scrub gently with your fingers under running warm water.
And avoid all UV devices from now on.
Nipple Grew Twice Its Size
You over-soaked it or boiled it in a pot, and looking closer, that swelling is irreversible; the pacifier is no longer safe.
Because the material’s integrity is compromised. Toss it. The replacement rule (4-6 weeks) becomes even more critical if you’ve accidentally mishandled a pacifier.
The Smell Won’t Go Away
Natural rubber latex has a faint inherent scent that should fade. After a few proper scaldings. If a sour or musty smell persists, the pacifier wasn’t dried completely. Before storage, or it’s simply reached end of life. Replace it.
Water Keeps Shooting Out Days Later
That means you didn’t squeeze hard enough originally. The vent holds a small reservoir. Do the squeeze test again. More constantly than not, if it persists. The seal inside the nipple may be damaged, that’s a replacement sign.
You’ll want to remember this for what’s coming next.
What to Do Next
Now that you’ve got the cleaning routine down, the best next move is to mark your calendar — remembering to replace BIBS pacifiers every 4 to 6 weeks is just as important as the cleaning itself. A worn-out nipple with micro-tears can harbor bacteria even after scalding.
Also, if you’re new to latex pacifiers, buy one extra to compare the size and texture after a month so you’ve a baseline. And factors in building a small “pacifier station” with a (which aligns with standard practices) bowl. Tongs, and drying rack. The whole process takes under 5, okay. More accurately, active minutes without you scrambling for supplies.
Under normal conditions, setting that to the side, once you nail this, you’ll stop throwing away pacifiers that still have weeks of life. Or at least, left, and you’ll rarely ever deal with the anxiety of handing your baby a moldy binky again.
Frequently Asked Questions
How often should I sterilize BIBS pacifiers?
For babies under 6 months, sterilize daily using the scalding method. After 6 months, thorough cleaning with hot soapy water. And a weekly scald is usually enough. But watch for signs of wear and always squeeze dry.
Can I use a steam sterilizer for latex BIBS?
Absolutely not. The nipple to soften excessively and deteriorate much faster than intended; that’s what happens when steam sterilizers expose the latex to prolonged moist heat. Stick to the pour-over method.
Why does my BIBS pacifier smell weird even after cleaning?
Latex has a natural earthy scent that fades with use. The thing is, that said, a sour or moldy smell points to trapped moisture or that the pacifier is past its replacement date of 4–6 weeks, and replace it immediately.
Is boiling water enough to kill all germs?
Yes, a 5-minute soak in water heated to 100°C reliably kills (a detail often overlooked) common household bacteria and pathogens. Combined with daily cleaning, this meets hygiene standards for infant pieces.
How do I clean the shield and ring separately?
Those polypropylene parts can be washed with warm soapy water and a soft brush. Don’t use abrasive cleaners or scrub pads that could scratch the surface and make hiding spots for bacteria.
When should I definitely throw away a BIBS pacifier?
Throw it away immediately if you see cracks, tears, stickiness, discoloration that won’t rinse off, or. If the nipple has expanded noticeably compared to a new one, even if it’s only been a few weeks.
🔍 Research Sources
Verified high-authority references used for this article