
Chances are, your AirPods case has seen things. Pocket lint, sticky fingerprints, maybe a stray coffee drip.
Still, it’s not a fashion statement anymore, it’s a grime magnet. You’ve probably thought about cleaning it. Worried about ruining the delicate electronics inside.
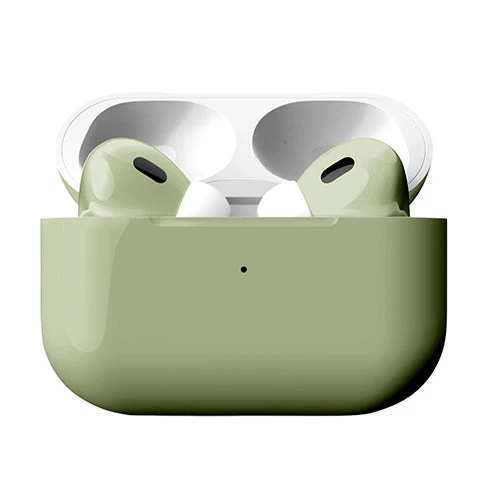
But here’s the thing – nine times out of ten, i learned that the hard way years ago with a previous wireless earbud case. Some overly zealous wiping. Actually, I should clarify: the case itself isn’t water-resistant, so never submerge it…which means the good news is you can get it looking almost new again with a few minutes.
The right approach. Most people overcomplicate this.
All you really need are a handful of common — you know what, household items and maybe 10 minutes of your time. By the end of this guide. You’ll know exactly how to clean an AirPods case thoroughly without damaging a single component. You’ll grasp which steps to skip if you’re in a rush.
TL; DR
- Use a dry microfiber cloth and 70% isopropyl alcohol applied to the cloth, never directly to the case, to wipe the exterior and dissolve grime.
- Clean the Lightning port and hinges with a soft-bristled brush and a wooden toothpick; never insert anything sharp or liquid inside.
- Let everything air-dry for at least 2 hours before using or charging again, otherwise residual moisture can cause a short.
Key Point
- Apple recommends a dry, lint-free cloth for routine cleaning; skip abrasive materials at all costs.
- A toothpick gently removes caked-up debris from port corners without scratching metal contacts—this saved my charging reliability once.
- If you’re unsure about speaker grille cleaning on the AirPods themselves, check the dedicated AirPods cleaning guide for safe methods.
What You’ll Need
A something like 70% isopropyl alcohol wipe, and the trend keeps going. Or a microfiber cloth lightly dampened with it’s your main workhorse. Apple’s guidelines back this up, and from personal trial, no. Scratch that, weaker alcohol leaves streaks while stronger stuff risks material degradation. Gather a dry, soft-bristled brush (an old toothbrush works well). A few clean cotton swabs, and a wooden toothpick or plastic scraper.
You might also want a can of compressed air; but honestly. Most advice about using compressed air is risky, it can push debris deeper into the port. Instead, rely on the brush.
Below is a rapid comparison of what each tool actually does.
| Tool | Use | What It Prevents |
|---|---|---|
| Microfiber cloth + 70% alcohol | Wiping exterior, lid, and removable silicone cases | Scratches, residue, and liquid damage |
| Soft-bristled brush | Cleaning Lightning port and hinge gaps | Internal damage from sharp objects |
| Wooden toothpick | Scraping hardened gunk from corners | Metal contact scratches |
| Cotton swab (dry or slightly damp with alcohol) | Precision cleaning around the lid and edges | Moisture seepage into internals |
A quick, direct answer: gathering these simple tools and setting aside 10-15 minutes prevents you from ever needing to replace a malfunctioning case due to built-up debris. Most case failures trace back to neglected port grime.
How much alcohol is too much?
Just a small amount on the cloth, so it’s scarcely (and that implies quite a bit) damp, not wet. If you can squeeze a drop out of the cloth. Funny enough, i once used a saturated wipe on the lid seam, and the next morning the LED flickered, lesson learned. Plus, a light swipe is enough to cut through grease without any risk.
Step 1: Prep Your Case and Clean the Exterior
Before you touch anything, remove both AirPods — which is why this seems obvious until you realize how often most of us try to clean around them and (which is a critical factor) press debris into the hinges. Also detach any protective silicone case. If you use one, those can be soaked in warm soapy water later.
With the case empty, take your microfiber cloth, and wipe down every outer surface using a bit of pressure where you see fingerprints, which means most likely never spray liquid directly onto the case or near the Lightning port. Those numbers tell a story.
I’ll say it again because this mistake is so common: the case isn’t water-resistant. Which means residue from even a tiny drop can linger and cause long-term corrosion. Actually, let me put that more precisely, the contacts on the case interior and the charging port are particularly vulnerable, so keep all moisture away from them. Of course, actual metrics may shift.
And yet, while you’ve the AirPods out. I find it helpful to give them a quick wipe too using a separate dry microfiber cloth. If you need a deeper clean there. The step-by-step method for AirPods walks you through it without damaging the mesh.
“The microfiber cloth and 70% alcohol method made my case look brand new again.” — A Reddit user’s sentiment, echoed by many who’ve revived scuffed cases.
Step 2: Deep-Clean the Port, Hinges, and Interior
This is where you address the real problem: caked-up lint. And dust inside the Lightning port that eventually blocks charging. To clean the port safely, grab your dry, soft-bristled brush.
Don’t twist or jab. It’s worth noting that if you see stubborn debris, take, you know what. A wooden toothpick (and rightly so) and carefully pry it out. A Reddit user noted they “used a toothpick to get the gunk out of the charging port. ” I’ve had the same success—once I extracted a tiny pebble that had been preventing my case from charging for weeks.
Similar to cleaning an iPhone charging port, the key is patience and no metal objects.
Next, tackle the hinges and the lid’s interior edge, and honestly, fold the lid open and use a cotton swab slightly dampened with alcohol to clean around (more on that later) the metal hinge contacts. Keep the swab away from the speaker grilles on the AirPods themselves—those are a whole different animal. If your calls sound muffled after cleaning. You might need to address the AirPods Pro microphone cleaning because those tiny grilles clog easily. For the case’s interior where the AirPods sit, a dry cotton swab usually suffices.
But dirt can accumulate in the shape of the earbuds. So inspect with a flashlight.
Why does Apple say no liquids at all?
So, in plain English: blocksep matters. Because even a minor exposure to moisture can creep into the logic board and corrosion can start silently. Apple’s official guidance states that AirPods. And their case aren’t water-resistant.
So they advise against any liquid contact; the key here is that Still, a barely damp alcohol wipe on the exterior plastic is widely accepted by tech repair pros, just be extremely careful near openings.
Troubleshooting & What to Do Next
Sometimes cleaning goes sideways. Which means here are the most common mistakes. And snappy fixes (and that implies quite a bit) to rescue the situation.
- Charging fails after cleaning: You probably plugged in too soon. Moisture inside the Lightning port can interrupt the connection. Let the case air-dry with the lid open for at least 2 full hours before attempting to charge again.
- Alcohol smell lingers: A little residue is normal; it evaporates. But if you soaked a cotton swab and left drops inside, gently wipe with a dry swab and give it extra drying time.
- Case discolored after using bleach or abrasive cleaner: Harsh chemicals can strip the plastic’s coating. There’s no reversal, but you can minimize further damage by sticking to 70% alcohol and microfiber only.
- Speaker mesh on AirPods muffled after cleaning the case: This usually means debris from the case transfered to the AirPods during reinsertion. Wipe the AirPods mesh with a dry brush—if that doesn’t help, the AirPods cleaning guide covers deeper mesh unclogging.
What to do next once the case is clean
Circling back for a moment, once you’re sure everything is dry, pop the AirPods back in and do (a detail often overlooked) a test charge. You get the idea. If the case still doesn’t respond, try a different Lightning cable.
Sometimes the lint removal fixed the port. But the cable is the problem. From here, adopt a quick weekly. To be more precise, wipe-down habit with a dry microfiber cloth. It takes 30 seconds and saves you from the 2-hour deep clean later. When you do eventually need a full AirPods cleaning again. The dedicated guide will help you get the earbuds themselves pristine without moisture damage.
People Also Ask
Can I use regular alcohol or hydrogen peroxide?
No. Stick with 70% isopropyl alcohol. 70% isopropyl strikes the right balance for dissolving oils without (more on that later) leaving moisture behind.
How often should I clean my AirPods case?
Quick summary so far: blocksep matters. A light exterior wipe once a week with a dry microfiber cloth is enough for most the majority. Do a deeper port cleaning every 2-3 months, or sooner. A different perspective. If you notice charging (which is a critical factor) issues or visible buildup. The case picks up more gunk from pockets than you’d think.
Does cleaning the case fix charging problems?
In most scenarios, often, yes, and let me tell you, if debris inside the Lightning port blocks the pins from making contact, a clear dry brush or toothpick removal restores charging instantly. Just be certain the port is completely dry before plugging in.
Is it safe to use a disinfectant wipe on the AirPods case?
A 70% isopropyl wipe used sparingly on the (at least in many practical scenarios) exterior plastic is generally fine. That’s a significant gap. Avoid the port area and almost never press tough; many disinfectant wipes contain bleach. Or other additives that degrade plastic over time, so check the label and limit use to occasional spot cleaning. You’ll want to remember this for what’s coming next.
- Gather tools — microfiber cloth, 70% isopropyl alcohol, soft brush, toothpick, cotton swabs.
- Remove AirPods and case cover — This prevents debris transfer and gives you full access.
- Wipe exterior — Dampen cloth lightly and wipe all outer surfaces, steering clear of the port.
- Clean port and hinges — Use brush and toothpick dry; inspect with a light.
- Wait 2 hours — Leave the case open to air-dry completely before charging or using again.
🔍 Research Sources
Verified high-authority references used for this article