
You know sinking feeling when the charger wobbles. The connection flickers, and the battery percentage refuses to budge. It happened to me last month.
The port looked fine from the outside, but apparently a half-year’s worth of pocket lint had been quietly compressed into a near-solid brick inside there. The fix cost me nothing.
I made a few mistakes along the way that could’ve been expensive. Which is exactly why I’m sharing what actually works. You’ll save about $100 to $200 on an out-of-warranty port replacement.
If you go about this the right way.
TL; DR
- Compressed lint is the most common cause of charging failure, not port damage, according to Apple Authorized Service Provider guidelines.
- Use only non-conductive tools like wooden toothpicks or plastic picks; metal tools can short circuits and permanently kill the charging circuit.
- 99% isopropyl alcohol is the only safe solvent because lower concentrations contain water that can corrode internal pins.
Key Point
- You’ll need a wooden toothpick, a can of compressed air, 99% isopropyl alcohol, a soft brush, and a flashlight — all non-conductive.
- Most cable looseness comes from lint at the bottom, not worn-out ports — that’s the first thing I check now before assuming hardware damage.
- The process takes less than 10 minutes if you’re careful, but rushing with metal tools will destroy the 24 internal USB-C pins.
What You’ll Need
You’ll need four things, a little patience, and absolutely zero metal.
The whole job from start to finish runs about 8 minutes. Skill level is beginner, no disassembly required.
- Wooden toothpick or plastic dental pick: Non-conductive and gentle on the 24 fragile pins inside a USB-C port. I’ve used both; toothpicks tend to snap less if you split them lengthwise.
- 99% isopropyl alcohol: Available at any pharmacy. According to iFixit technical staff, you must use the highest percentage because it evaporates before damaging sensitive traces. Lower percentages like 70% contain water that can corrode the connector over time.
- Soft, clean brush: A small artist brush or a dedicated electronics cleaning brush. Something with natural bristles so it won’t shed plastic.
- Flashlight: The built-in phone light works fine. You’ll need it to inspect the port’s inner corners after cleaning.
What about compressed air?
Compressed air often pushes debris deeper inside the chassis.
That’s the short answer. Many guides recommend it, but I’ve seen those little bursts shove lint past the connector housing and straight into the laptop’s interior, which is a much bigger headache. Use it sparingly and only at a shallow angle, if at all.
Step 1: Shut Down Completely and Inspect
Power down your MacBook and disconnect it from any cable before you even look at the port.
This eliminates any chance of a short circuit while you’re working. Then grab your flashlight and peer directly into the charging port. Look for dull grey fuzz, compacted debris, or tiny metal shards that the magnets in MagSafe 3 ports are notorious for attracting.
Step 2: Remove Dry Debris With Non-Conductive Tools
Take a wooden toothpick and gently scrape along the port’s edges, pulling lint toward you, never pushing straight in.
The pins on the bottom of USB-C are incredibly delicate. I wiggle the toothpick along the sidewalls to avoid direct pressure on them. You’ll be surprised how much compacted fiber comes out on the first pass. It often looks like a miniature felt pad.
“My cable felt loose for months, and I thought the port was broken, but it was just a giant ball of lint at the bottom.”
This quote from a seasoned Mac user sums up most port issues, and the debris layer prevents the. To be more precise, connector from seating fully, so the cable jiggles and sometimes (and the data generally agrees) won’t trigger rapid charging.
How do I know if it’s lint or actual port damage?
If the port looks physically straight and the cable fits loosely even after thorough cleaning, the pins themselves may be bent.
Usually you’ll see a shiny metal surface with no obstruction after proper cleaning. If you still have wobble, hold the connector gently while it’s plugged in to see if the play is in the port housing or the cable head.
Step 3: Apply 99% Isopropyl Alcohol for Stubborn Grime
Dip a soft brush in 99% isopropyl alcohol, tap off the excess, and very lightly brush the interior walls.
This is only for sticky residue or if the port was exposed to something sugary. I’ve used this maybe twice in five years. The trick is using almost no liquid, just damp, not wet.
Is 70% isopropyl alcohol okay in a pinch?
**No, because the 30% water content can cause corrosion on the port’s pins and trick the moisture sensors.**99% is non-negotiable for electronics work. If you only have 70%, you’re better off sticking to dry cleaning and skipping the alcohol entirely.
Troubleshooting: Common Mistakes
Most failed cleanings happen because someone used a metal object or pushed too hard.
Here are the three big ones and how to recover.
Mistake 1: The cable still wobbles after cleaning
There might be debris wedged under the pin row that you couldn’t see.
Try using a plastic dental pick with a slight hook to very gently draw along the bottom edge, not the pins themselves. If the problem persists and you’re comfortable, inspect the cable’s own tip for foreign matter on top of that.
Mistake 2: Charging hasn’t improved
The charging brick or cable could be the culprit, not the port.
Test with another charger if available. Also, check that the contact pads on the cable aren’t worn down. Some MacBooks require a specific minimum wattage to start charging, so a lower-wattage brick may not work even with a clean port.
Mistake 3: You accidentally bent a pin
If you see a pin that looks slanted or out of alignment, stop. That’s a professional repair.
Bending a USB-C pin can short multiple voltage lines the next time you connect power. Asurion’s tech blog notes this is probably the most expensive DIY mistakes because it can cascade into logic board damage.
What to Do Next
Prevention is simpler than you’d think.
After cleaning, here’s how to keep the port lint-free.
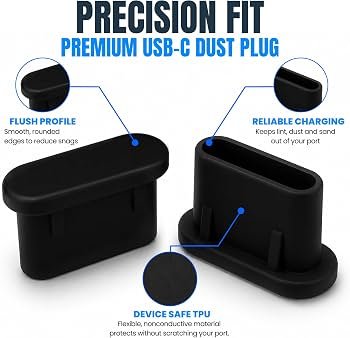
Get a port plug or case
At this point, a small silicone dust plug costs less than $5…which means and slides into the port when not in use. I keep one on my MacBook whenever it’s in my bag, which means it blocks both lint, and the magnetic attraction of metal shavings (more on that later) for MagSafe models.
Schedule a quick check every 3 months
Set a phone reminder to inspect the port with a flashlight. Takes 30 seconds. You’ll catch buildup before it compacts into a brick… by the way, if you’re also dealing with noisy fans, clearing out the internal dust does wonders too; here’s a gentle fan cleaning method that doesn’t risk the blades.
Monitor your cable condition
And sure enough, taking a different approach here. A worn cable tip can act like sandpaper inside the port, set up particles. Replace the cable once the exterior shows any cracking. The cost of a new USB-C cable (around $20) is far less than the $100 to $200 you’ll spend on a port repair down the line.
- Bookmark this guide — so you remember the tool and alcohol requirements next time lint builds up.
- Inspect your port tonight — use a flashlight and look for the metallic shine of the pins.
- Order 99% isopropyl alcohol — if you don’t have it, get a bottle online for future electronics cleaning.
- Buy a port plug — a pack of 5 costs less than $10 and saves you future hassle.
People Also Ask
What is the safest way to clean a MacBook charging port?
Use a wooden toothpick to gently dislodge lint, then a soft brush dampened with 99% isopropyl alcohol for any residue.
Always power down first. Metal tools risk short circuits and permanent motherboard damage.
Can I use compressed air to clean the charging port?
Compressed air can push lint deeper into the chassis, so it’s riskier than a non-conductive pick.
If you use it anyway, keep the can upright and aim across the opening at a shallow angle, not straight in.
How do I clean a MagSafe port differently from USB-C?
MagSafe 3 ports have magnets that attract tiny metal shards, so you’ll often need adhesive putty to pull them out.
The five magnetic pins are solid, but still avoid metal tools that could short the connection.
How often should I clean my MacBook charging port?
Every 3 to 4 months, depending on how linty your pockets or bags are.
A quick flashlight check is enough. You’ll know it’s time when the cable no longer snaps in with a satisfying click.
Will cleaning the port void my Apple warranty?
Not if you use only non-conductive tools and barely any liquid.
The risk comes from over-saturating with alcohol, which can trigger liquid contact indicators and void the warranty.
What if my MacBook still won’t charge after cleaning?
Try a different charger and cable Right off the bat, because the issue may not be the port at all. If multiple chargers fail and the port pins look straight, there could be a deeper logic board issue requiring professional service.
🔍 Research Sources
Verified high-authority references used for this article