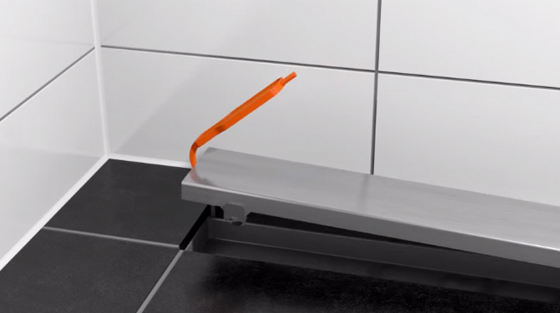
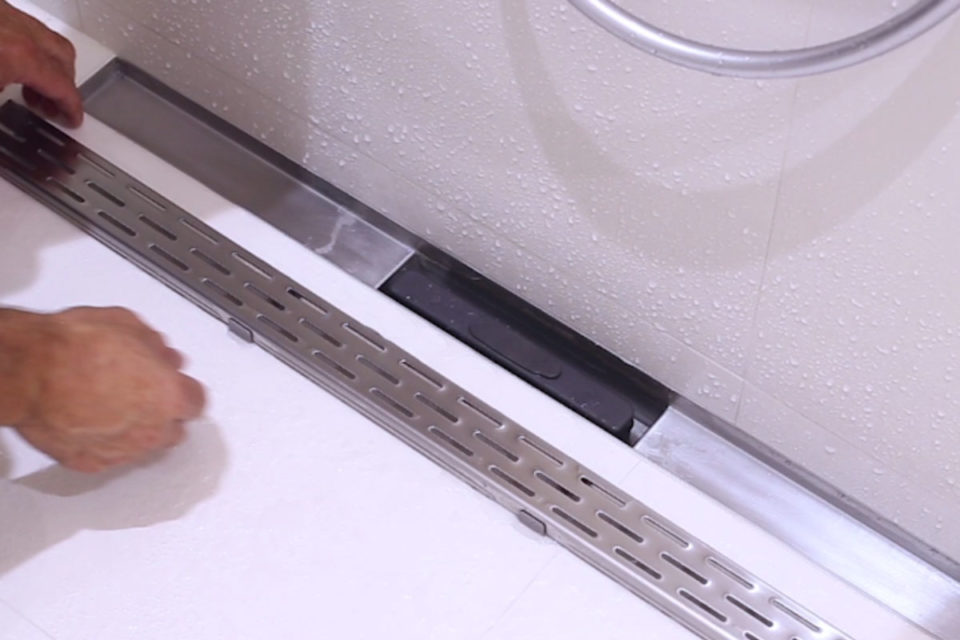
To clean a linear shower drain, remove the drain cover and clear debris using a brush or vacuum. Rinse thoroughly with water.
Keeping your linear shower drain clean is essential for maintaining proper water flow and hygiene. A clogged drain can lead to water pooling, unpleasant odors, and potential damage to your bathroom floor. Regular cleaning prevents buildup of soap scum, hair, and other debris, ensuring your shower functions efficiently.
Start by removing the drain cover, which may require a screwdriver or simply lifting it off. Use a brush or vacuum to clear out any visible debris. Finally, rinse the drain with water to remove any remaining particles. Performing these steps routinely keeps your shower drain in optimal condition, enhancing your overall bathroom experience.

Credit: www.youtube.com
Tools And Materials
To clean a linear shower drain, you’ll need the right tools and materials. This ensures thorough cleaning and prevents blockages. Below, we detail the essential tools and recommended cleaning products.
Essential Tools
- Screwdriver: To remove the drain cover.
- Drain Snake: To reach and remove debris.
- Bucket: To collect water and debris.
- Brush: For scrubbing the drain.
- Gloves: To protect your hands.
Recommended Cleaning Products
- Vinegar: Natural and effective for cleaning.
- Baking Soda: Helps break down grime.
- Bleach: For deep cleaning and disinfection.
- Dish Soap: Cuts through grease and dirt.
| Tool | Purpose |
|---|---|
| Screwdriver | Remove drain cover |
| Drain Snake | Remove debris |
| Bucket | Collect water and debris |
| Brush | Scrub the drain |
| Gloves | Protect hands |
Choose the right tools and materials to keep your linear shower drain clean. This prevents clogs and ensures smooth drainage.

Credit: www.easydrain.com
Preparation
Cleaning a linear shower drain starts with proper preparation. This ensures the task is smooth and effective. Follow these steps for a clean and functional drain.
Safety Precautions
Before starting, make sure to follow these safety measures:
- Wear rubber gloves to protect your hands.
- Ensure the shower area is dry to avoid slips.
- Use a mask if you are sensitive to dust or mold.
Initial Inspection
Begin with a thorough inspection of the drain. Look for visible debris or blockages.
- Remove the drain cover carefully. Use a screwdriver if needed.
- Check for hair, soap scum, and other debris.
- Use a flashlight to see inside the drain.
This initial check helps identify the cleaning tools you’ll need.
Removing The Drain Cover
Removing the drain cover is the first step to clean your linear shower drain. This process varies depending on the type of drain cover you have. Understanding how to remove the cover ensures you can access and clean the drain effectively.
Types Of Drain Covers
Different drains have different covers. Here are some common types:
- Screw-in Covers: These are secured with screws. They are very stable.
- Snap-in Covers: These snap into place. They are easy to remove.
- Tile Insert Covers: These blend with the shower floor. They are stylish and functional.
Steps To Remove The Cover
Follow these steps to safely remove the drain cover:
- Gather Tools: You may need a screwdriver or a small prying tool.
- Locate Screws: For screw-in covers, find and remove the screws.
- Remove the Cover: Lift or pry the cover gently. Be careful not to damage it.
- Inspect the Drain: Check for any debris or blockages.
Here is a table summarizing the types of drain covers and tools needed:
| Type of Drain Cover | Tools Needed |
|---|---|
| Screw-in Covers | Screwdriver |
| Snap-in Covers | Small prying tool |
| Tile Insert Covers | Small prying tool or screwdriver |
By following these steps, you can remove the drain cover easily. This allows you to clean your linear shower drain properly.
Cleaning The Drain Channel
Keeping your linear shower drain clean is essential for its efficiency. A clean drain prevents clogs and maintains good hygiene. Regular cleaning ensures that water flows smoothly. Follow these steps to clean the drain channel effectively.
Clearing Debris
First, remove the drain cover carefully. Check for visible debris on the surface. Use a pair of gloves to pick up larger debris by hand. Place the debris in a trash bag for disposal.
Next, use a vacuum cleaner with a narrow attachment. This helps in sucking up smaller particles. Ensure you reach into the corners of the drain channel. A clean channel prevents water build-up and keeps odors at bay.
Scrubbing Techniques
Prepare a cleaning solution using warm water and mild soap. Pour this mixture into a spray bottle. Spray the solution generously over the drain channel. Let it sit for a few minutes to loosen grime.
Use a scrub brush with soft bristles to clean the drain. Scrub all sides of the channel thoroughly. Pay special attention to corners and edges. A toothbrush can help reach tight spots.
For tough stains, mix baking soda and vinegar. Apply the paste to the stained areas. Let it sit for 10 minutes before scrubbing. Rinse the drain channel with clean water. Dry the area with a clean cloth to prevent mold growth.
| Step | Action |
|---|---|
| 1 | Remove drain cover |
| 2 | Clear visible debris |
| 3 | Use vacuum cleaner |
| 4 | Spray cleaning solution |
| 5 | Scrub with brush |
| 6 | Apply baking soda and vinegar |
| 7 | Rinse and dry |
Clearing The Drainpipe
Cleaning a linear shower drain is crucial for smooth water flow. The drainpipe can get clogged with hair, soap scum, and debris. Clearing the drainpipe ensures your shower stays clean and functional. Below are effective methods to clear the drainpipe.
Using A Plunger
A plunger can be your first tool for clearing a clogged drainpipe. Follow these steps:
- Fill the shower with a small amount of water.
- Place the plunger over the drain opening.
- Push down and pull up the plunger several times.
- Remove the plunger and check if the water drains.
If the water drains slowly, repeat the process. This method is simple and often effective for minor clogs.
Applying A Drain Snake
For tougher clogs, a drain snake can be more effective. Here’s how to use it:
- Insert the drain snake into the drain opening.
- Turn the handle to push the snake further down.
- When you feel resistance, rotate the snake to catch debris.
- Pull the snake out slowly, bringing the clog with it.
- Run water to see if the clog is cleared.
A drain snake can reach deeper blockages that a plunger might not. It’s a valuable tool for maintaining your linear shower drain.
Remember, regular maintenance can prevent severe blockages. Check and clean your drainpipe regularly for a hassle-free shower experience.

Credit: www.easydrain.com
Reassembling The Drain
Reassembling the drain is a crucial final step in the cleaning process. Proper reassembly ensures your linear shower drain functions efficiently. This section will guide you through inspecting for damage and securing the drain cover.
Inspecting For Damage
Before reassembling, inspect the drain parts for any signs of damage. Look for cracks, rust, or any wear and tear on the drain components. If you find any damaged parts, consider replacing them.
Use a flashlight to check the inside of the drain for any hidden damage. Ensure the drain channels are clear and free of debris.
Securing The Drain Cover
After inspection, it’s time to secure the drain cover. Align the drain cover with the drain body. Ensure it fits snugly without any gaps.
Use the screws provided to secure the drain cover in place. Tighten each screw evenly to avoid tilting the cover. Make sure the cover is flush with the shower floor.
Double-check the installation to ensure the cover is secure and stable. A properly secured drain cover prevents clogging and enhances drainage efficiency.
Maintenance Tips
Maintaining a linear shower drain is crucial for its longevity and efficiency. Proper maintenance ensures smooth water flow and prevents clogs and bad odors. Follow these maintenance tips to keep your linear shower drain in top condition.
Regular Cleaning Schedule
Establishing a regular cleaning schedule is key to maintaining your drain. Clean the drain at least once a week to remove hair, soap scum, and other debris.
- Remove the drain cover carefully.
- Use a brush to clean the drain cover and the surrounding area.
- Rinse the cover with warm water.
- Use a pipe cleaner to remove blockages inside the drain.
Weekly cleaning prevents buildup and keeps your drain functioning properly.
Preventive Measures
Implementing preventive measures can save you time and effort in the long run. Consider these steps to keep your drain clean:
- Install a hair catcher: This prevents hair from entering the drain.
- Avoid pouring grease: Grease can solidify and cause blockages.
- Use a drain cleaner monthly: Choose an eco-friendly option to break down buildup.
- Flush with boiling water: Do this weekly to keep the drain clear.
These measures help maintain a clean and efficient shower drain.
Proper maintenance ensures your linear shower drain works well for years. Follow these tips for hassle-free shower experiences.
Frequently Asked Questions
How Often Should You Clean A Linear Shower Drain?
Clean the drain every two to four weeks to prevent clogs and maintain water flow.
What Tools Do I Need For Cleaning?
You’ll need a screwdriver, brush, mild detergent, and a pair of gloves for effective cleaning.
Can I Use Bleach To Clean The Drain?
Yes, but dilute the bleach with water to avoid damaging the drain and surrounding areas.
What Are The Steps To Clean The Drain?
Remove the cover, scrub the drain, rinse with water, and replace the cover securely.
How Can I Prevent Future Clogs?
Install a hair catcher, clean regularly, and avoid flushing non-dissolvable items down the drain.
Conclusion
Cleaning your linear shower drain regularly ensures a smooth water flow. It prevents clogs and maintains hygiene. Follow the steps mentioned to keep your drain in top condition. A clean drain extends its lifespan and enhances bathroom safety. Make this routine a part of your cleaning schedule for optimal results.
