
Nothing kills a Saturday cleaning session faster than a machine that leaves your carpet smelling like a damp locker room — which is why you could say turned out, I’d been ignoring the wildly thing that makes it work. Fact is, the cleaner itself needs cleaning. If you think about it, a carpet cleaner drags up all the gunk, hair, and soap scum. If you don’t deep clean the machine, you’re just redistributing that mess the next time you use it.
Let’s get that Hoover back to peak condition without a single trip to the repair shop. You’ll need about 30–45 minutes and a little elbow grease.
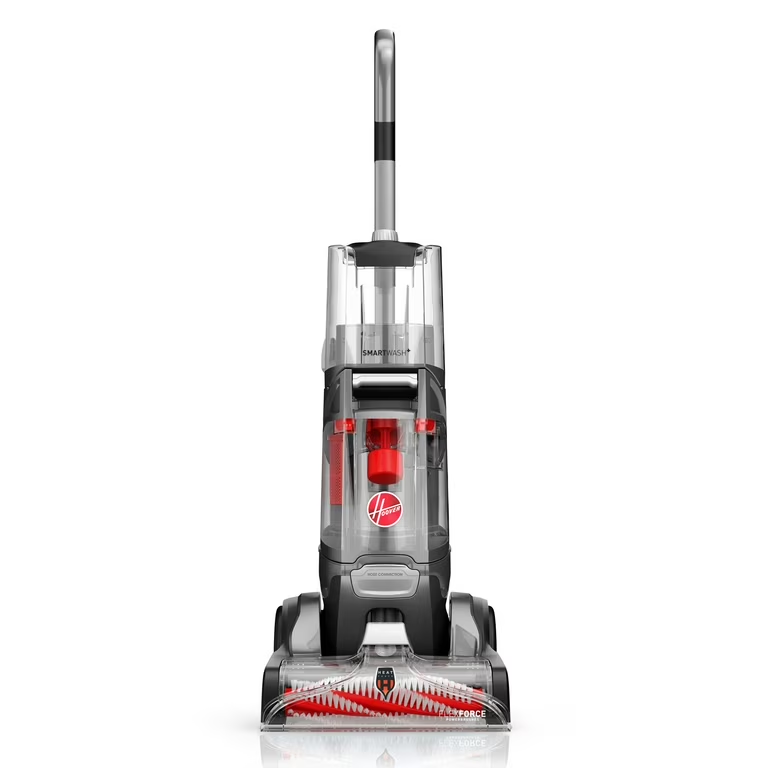
TL; DR
- Flush the machine with plain hot water for 60 seconds after every use to stop chemical buildup from hardening inside the valves and lines.
- Remove the nozzle cover and physically scrape out trapped hair with the included clean-out tool or a bent wire; that single clog is the #1 cause of lost suction.
- Pop out the brush rolls, soak them in warm soapy water, and rinse the tank’s screen and float stack so the motor never overheats.
Key Point
- Every Hoover model hides dirt in the same four spots: the recovery tank, the nozzle, the brush rolls, and the underside base. Hit all four and the machine runs like new.
- Dry time matters: let parts air-dry at least 24 hours before reassembly, or you risk mold in the nooks of the tank (yes, there are hidden nooks you’ll miss if you don’t use a fan).
- A quick final rinse with white vinegar keeps the tubes clearer for months; plain water alone doesn’t cut the soap film.
What You’ll Need
You’ll be working with water, so set up near a utility sink or bathtub; a solid pair of gloves helps mostly since the gunk is, well, gross.
Tools and supplies
- Phillips head screwdriver (only for older PowerDash models; most modern Hoovers have tool-free brush roll release)
- Nozzle clean-out tool (that thin plastic spike that came with your machine) or a 0.5 mm wire hook—a bent paperclip works in a pinch
- Soft-bristled brush (an old toothbrush does wonders)
- Two clean microfiber cloths
- A bucket or sink large enough to submerge the brush rolls
- Mild dish soap
- White vinegar (about 1 cup for the final rinse)
- A small fan (optional but golden for drying)
Time and skill level
- Active labor: 30 to 45 minutes
- Drying: 24 hours
- Skill: beginner; if you can unscrew a cap and scrub a dish, you’re overqualified
Step 1: Flush Out the Dirty Water Tank and Screen
Most problems start in the recovery tank. A clogged screen chokes airflow. Which reduces water pickup and makes the motor work harder.
Cleaning this part. After every use keeps the whole system alive.
On a slightly different note, empty the dirty water tank completely, then lift out the screen filter inside it. Run both under warm water while rubbing the screen mesh with your fingers to dislodge any stringy fibers. For the tank itself, fill it halfway with warm water, and a drop of dish soap, cap it, and shake vigorously for 30 seconds; dump, rinse, and leave the lid off to dry.Pour a quarter cup of white vinegar into the tank.
Why does my Hoover leave the carpet wet even after multiple passes?
Here’s the thing – in most scenarios, almost always. The screen filter is partially blocked, so the vacuum can’t pull water efficiently. Clean that screen For one, then retest. If the problem persists. Looking closer, the float stack might be stuck. We’ll get to that in Step 4.
Step 2: Clear the Nozzle and Suction Path
Make it the nozzle. Nine times out of ten. A clogged nozzle turns your cleaner into a glorified water sprayer. Carolyn Forte from the Good Housekeeping Institute puts it bluntly. Worth considering. “If you don’t clean the nozzle. Hang on – there’s more.
Remove the clear nozzle cover by pressing the release tabs gently, don’t force them. The plastic gets brittle over time, especially if the machine is a few years old. Inside, you’ll find a narrow channel jammed with pet hair. Lint, and dried soap. Use the clean-out tool to scrape every inch of the path, and honestly. I’ve pulled out wads of hair that looked like a tiny rodent nest, and once that stuff is gone, suction almost doubles.
For the SmartWash model; users on Reddit complain that hair gets wedged in a spot you can’t reach (which aligns with standard practices) with the official tool, and honestly, that’s understandable. A pipe cleaner bent into a small hook works better. Feed it in, twist, and pull the gunk out.
What’s the white residue on my nozzle after every clean?
In plain English: blocksep matters, but here’s the thing – that’s dried formula residue from (which aligns with standard practices) the cleaning solution.
If you don’t flush the lines as described in Step 5. This residue hardens and eventually blocks the soap injector.
A snappy scrub with a brush, and warm water removes it.
“If you don’t clean the nozzle after every use, you’re essentially dragging a dirty squeegee across your floor.” — Carolyn Forte, Good Housekeeping Institute
Step 3: Soak and Scrub the Brush Rolls
Brush rolls are hair magnets, and tangled fibers strain the drive belt and reduce agitation, so your carpets don’t get scrubbed properly, and on most Hoover models, you press the release tabs and the rolls pop right out. Worth considering. Worth considering. Older PowerDash units need a Phillips head screwdriver to remove a couple of screws first.
Submerge the rolls in a bucket of warm. Soapy water and let them soak for 15 minutes. While they soak, use your fingers to peel off wound-up hair, scissors help when the hair is tightly knotted, and. After soaking, scrub the bristles with an old toothbrush until they (which completely makes sense logically) look almost new.Never reinstall wet brush rolls.
Can I just run the machine with plain water to clean the brushes?
For the average user, sure enough, running the machine over a pain floor can rinse some dirt off the brushes, but it won’t remove the tightly wound hair that digs into the bristle base. Physical removal beats running it wet every time.
Step 4: Clean the Underside Base and Float Stack
This is the area most people completely ignore, and the underside of the machine, right where the brushes sit, collects a film of mud and debris that eventually flakes off onto your clean carpet. Wipe it down with a damp microfiber cloth. After every deep clean.
Inside the dirty water tank, you’ll see a cone-shaped plastic piece, the float stack. It shuts off the vacuum.
When the tank is full to prevent overflow, but if it’s coated in gunk, it triggers prematurely.
The machine stops sucking while it’s still half empty. Stats confirm it. Pop the float stack out (it usually twists and lifts), rinse it under warm water, and poke a pipe cleaner through the tiny hole at the top to make sure it’s clear.
Reinstall and test by blowing into it; the float should move freely.
The machine keeps shutting off after 30 seconds. What’s going on?
Then again, that’s the float stack being sticky. Clean it as described, and if the problem persists, the tank itself mightn’t be seated correctly, push down firmly until you hear a click.
Step 5: Final Rinse and Dry Everything Completely
Soap residue is the silent killer. After you’ve reassembled the clean parts.
Fill the clean water tank with hot water—no formula—and run the machine over a tiled floor for a (at least based on current observations) full 60 seconds. Read that again if you need to. Worth pausing on that one. Which means for an even better flush, add a cup of white vinegar to the water; long-time Hoover owners swear by it. Then run another cycle with plain water to rinse the vinegar out.
Set all parts in a well-ventilated area for a full 24 hours. Point a small fan at the tanks to speed things up, and stop mold from growing in (depending entirely on the context) the hidden crevices. Once everything is bone dry, snap it back together.
- Empty and rinse the recovery tank — including the screen, every time.
- Scrape out the nozzle channel — use the clean-out tool or a hook.
- Soak and de-hair the brush rolls — soak 15 min, then scrub.
- Wipe the underside base — and clean the float stack.
- Flush the whole system with hot water — add vinegar for extra clarity.
- Let everything dry 24 hours before reassembly.
Troubleshooting
Even after a deep clean, hiccups happen — here are the most common ones and how to fix them. Stick with me here; this pays off.
Machine won’t turn on; Check the power cord and outlet first, then look at the brush roll: if it’s jammed tight with hair, the overload protector may have tripped. Give it 15 minutes to cool down after clearing the jam.Water won’t spray, The solution tank might be empty, or the nozzle is so clogged that the spray path is blocked. Run the flush cycle from Step 5 and then clean the nozzle again.Loud grinding noise, The brush roll isn’t seated correctly, or the belt has slipped. Remove and reseat the rolls, making sure they click into the drive slots.Carpet smells worse after cleaning; The machine was left wet, and bacteria grew inside the tank. Clean the tank with a bleach and water solution (1:10 ratio), rinse thoroughly, and dry with a fan for 48 hours. Once the smell is gone, always dry parts completely after each use. If your carpet itself is the source, you might need to tackle a truly disgusting carpet by hand first.
People Also Ask
How often should I clean my Hoover carpet cleaner?
Pivoting slightly, after every use, empty and rinse the recovery (a detail constantly overlooked) tank and clean the nozzle. This prevents the slow buildup that kills motors.
Can I use a generic cleaner instead of Hoover formula?
You can, but stick to fixes rated for carpet extractors. Generic brands often foam too much, which overworks the motor. Hoover’s own formula is low-suds and formulated to leave less residue. And let me tell you, if you use another brand, add a defoamer.
What’s the difference between cleaning the SmartWash and PowerScrub nozzles?
The SmartWash nozzle has a tighter, L-shaped channel that traps hair more aggressively. You’ll need a flexible tool. Not just the straight clean-out spike, to reach all the way through.
Moving forward. PowerScrub nozzles are more open and easier to clear.
File that away. You’ll see why it matters in a bit.
Will using vinegar damage the machine?
White vinegar diluted in water is safe for all Hoover plastic parts and seals. Don’t use undiluted vinegar. Who would have thought? And always follow with a plain-water flush. The acidity is mild enough to dissolve soap scum without corroding components.
How do I know if the belt needs replacing?
On closer inspection, if the brush rolls spin slowly. Or stop under light pressure even when clean, the belt is stretched. Plus, hoover sells replacement kits online.
You’ll want to pay attention here. On most models, you can inspect the belt by removing the brush cover, if it’s cracked. Or has a shiny glazed surface, replace it.
What to Do Next
After your Hoover is reassembled and dry, fill the clean tank with the correct ratio of solution (3 ounces of concentrate per 1 gallon of water. And per the manual). And run a test on a small, hidden patch of carpet. Check that water sprays. Brushes spin, and suction pulls water back. Looking closer, if everything works; you’ve just extended the life of your machine by years.
Next session, make the flush cycle a habit. If you ever skip a cleaning, remember. The dirt you leave inside today is what ruins the carpet tomorrow. Keep a note on the machine to remind yourself, it takes 90 seconds, and it saves a (a detail often overlooked) $200 repair bill.
🔍 Research Sources
Verified high-authority references used for this article