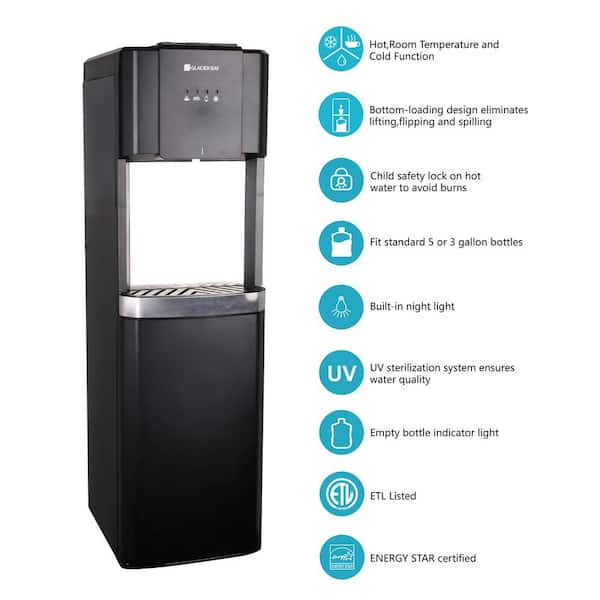
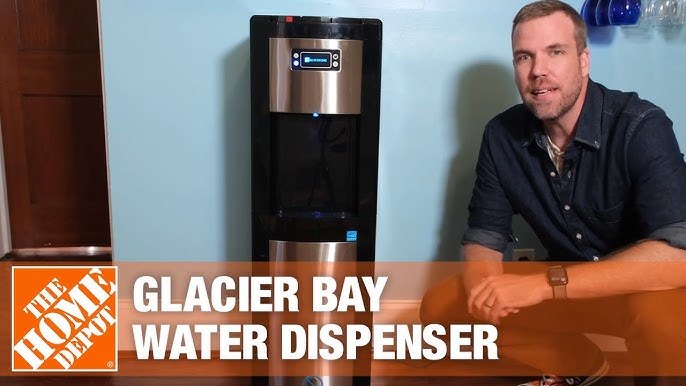
Cleaning your Glacier Bay water dispenser is crucial for maintaining its efficiency. It ensures you have safe, fresh-tasting water every time.
A clean water dispenser not only tastes better but is also healthier. Bacteria and mold can grow in damp places, including water dispensers. Regular cleaning prevents this. In this guide, you’ll learn how to clean your Glacier Bay water dispenser thoroughly.
We’ll cover all the steps to keep it in top condition. This process is simple and can be done with items you already have at home. By following these steps, you’ll ensure your water stays pure and refreshing. Let’s dive in and make your water dispenser spotless.
Gathering Supplies
Before you begin cleaning your Glacier Bay water dispenser, it’s important to gather all the necessary supplies. This will ensure the process goes smoothly and effectively. Having everything ready will save you time and help you clean thoroughly.
List Of Cleaning Materials
You will need a few basic materials to clean your Glacier Bay water dispenser.
- White vinegar: A natural disinfectant to remove bacteria and mold.
- Baking soda: Helps in scrubbing and deodorizing.
- Soft cloth or sponge: For wiping surfaces without scratching.
- Bucket: To mix cleaning solutions.
- Brush: A small brush to clean hard-to-reach areas.
- Dish soap: Mild soap for general cleaning.
- Water: Clean water for rinsing.
Safety Precautions
Cleaning a water dispenser involves handling cleaning agents and electrical components. Follow these safety precautions.
- Unplug the dispenser: Always disconnect the unit from the power source before cleaning.
- Use gloves: Wear rubber gloves to protect your hands from cleaning agents.
- Ventilation: Ensure the area is well-ventilated when using vinegar or other strong cleaners.
- Avoid harsh chemicals: Stick to natural cleaners like vinegar and baking soda.
By gathering the right supplies and following safety precautions, you’ll ensure a safe and effective cleaning process.
Preparing The Dispenser
Before you start cleaning your Glacier Bay water dispenser, proper preparation is crucial. This ensures a thorough and effective cleaning process. Follow these steps to get your dispenser ready for cleaning.
Unplugging And Emptying
First, unplug the water dispenser from the power source. This step is essential for safety. Once unplugged, empty the water from the dispenser. This includes both the hot and cold water tanks. Place a bucket or bowl under the dispenser to catch any drips.
Disassembling Parts
Next, disassemble the parts of the water dispenser. Remove the water bottle and set it aside. Take off the drip tray and any other removable parts. Refer to your user manual if needed. Make sure to handle all parts carefully.
Now, you are ready to clean each part separately. This ensures a thorough clean and helps maintain your dispenser’s longevity.
Cleaning The Exterior
Keeping the exterior of your Glacier Bay water dispenser clean ensures a fresh look and maintains hygiene. Below are detailed steps for cleaning different parts of the exterior.
Wiping Down Surfaces
First, unplug the water dispenser. This ensures safety while you clean. Use a soft cloth and mild detergent. Wipe down the exterior surfaces. Focus on areas touched frequently. This includes the top, sides, and front panels. Avoid abrasive cleaners. They can scratch the surface. Rinse the cloth with clean water. Wipe again to remove any soap residue. Dry with a clean towel to prevent water spots.
Cleaning The Drip Tray
The drip tray catches spills and overflow. Clean it regularly to avoid mold and bacteria. Remove the drip tray from the dispenser. Empty any water collected in it. Wash the tray with warm, soapy water. Use a sponge or brush to scrub away any residue. Rinse thoroughly under running water. Dry it completely before placing it back. This ensures no moisture remains to harbor bacteria.

Credit: www.homedepot.com
Cleaning The Interior
Cleaning the interior of your Glacier Bay Water Dispenser is essential for ensuring fresh and clean water. This process involves sanitizing the reservoir and cleaning the water lines. Follow these steps to keep your water dispenser in excellent condition.
Sanitizing The Reservoir
First, unplug the water dispenser. Remove the reservoir lid. Mix a solution of one tablespoon of bleach with one gallon of water. Pour the solution into the reservoir. Let it sit for 15 minutes. This will kill any bacteria or mold. After 15 minutes, drain the solution. Rinse the reservoir with clean water several times. Ensure no bleach remains. Wipe the interior with a clean cloth. Let the reservoir air dry.
Cleaning The Water Lines
Next, focus on the water lines. Fill the reservoir with clean water. Dispense the water through the taps. This will flush out any remaining bleach solution. Repeat this process until the water runs clear. Check the lines for any blockages. If you find any, use a small brush to remove them. Rinse the lines thoroughly. This ensures your water remains pure and safe to drink.
Reassembling The Dispenser
After cleaning your Glacier Bay water dispenser, it’s time to reassemble it. This step is crucial to ensure your dispenser works correctly and remains clean. Follow these steps to put everything back together properly.
Reattaching Parts
Start by reattaching the main components. Place the water reservoir back into its slot. Ensure it sits firmly in place. Next, attach the drip tray. Align it with the slots below the dispenser taps. Slide it in until it clicks.
Reconnect any removable parts you took off for cleaning. This includes the taps and buttons. Carefully push each part into its designated spot. Make sure they are secure.
Ensuring Proper Fit
Check if all parts fit snugly. There should be no gaps between the components. Loose parts can cause leaks or malfunction. Give each part a slight tug. If it moves, it needs to be adjusted.
Test the dispenser by running a small amount of water through it. Observe for any leaks or unusual noises. This helps ensure everything is in place. If you notice any issues, recheck the parts for proper fit.
Proper reassembly is key for the long-term use of your Glacier Bay water dispenser. Taking time to do it right ensures smooth operation and clean water.
Flushing The System
Keeping your Glacier Bay water dispenser clean is crucial for optimal performance and hygiene. One of the essential steps in maintaining your dispenser is flushing the system. This ensures that any impurities or residues are removed, providing you with clean and safe drinking water.
Running Clean Water
Start by removing the water bottle from the top of the dispenser. Then, pour clean, fresh water into the top of the dispenser. Make sure the water is at room temperature.
Turn on the dispenser and let the water run through the system. This will help to flush out any remaining old water or residue. Allow the water to flow until it runs clear.
Repeat this process at least twice to ensure thorough cleaning. Clean water should run clear without any particles or discoloration.
Checking For Residue
After running clean water through the system, it’s essential to check for any remaining residue. Look inside the water reservoir and around the taps. Use a clean cloth or sponge to wipe away any visible particles.
If you see any stubborn residues, mix a solution of vinegar and water. Use a soft brush to scrub the affected areas gently. Rinse with clean water to remove the vinegar solution.
Ensure that all parts are thoroughly cleaned and free of any residue before reassembling the dispenser. Proper cleaning will help maintain the quality and taste of your drinking water.
Maintenance Tips
Maintaining your Glacier Bay water dispenser ensures it functions well and provides clean water. Regular cleaning keeps the dispenser hygienic and free from bacteria. Follow these tips to keep your water dispenser in top shape.
Frequency Of Cleaning
Clean your Glacier Bay water dispenser every three months. Regular cleaning prevents mold and bacteria buildup. If you use it frequently, consider cleaning it every month.
| Usage | Cleaning Frequency |
|---|---|
| Low (1-2 times/day) | Every 3 months |
| Medium (3-4 times/day) | Every 2 months |
| High (5+ times/day) | Every month |
Troubleshooting Common Issues
Sometimes, your Glacier Bay water dispenser may face issues. Here are common problems and solutions:
- Dispenser not dispensing water: Check the water bottle. Ensure it is properly installed and has water.
- Water tastes odd: Clean the dispenser. Replace the water bottle if needed.
- Water leaks: Inspect the water bottle for cracks. Ensure all parts are tightly secured.
By following these maintenance tips, you can keep your Glacier Bay water dispenser clean and functional. Regular cleaning and troubleshooting common issues will ensure you always have fresh water at your fingertips.

Credit: m.youtube.com

Credit: m.youtube.com
Frequently Asked Questions
How Often Should I Clean My Glacier Bay Water Dispenser?
Clean your Glacier Bay water dispenser every 2-3 months to ensure it stays hygienic and functions well.
What Supplies Do I Need To Clean The Dispenser?
You will need white vinegar, warm water, a soft cloth, and a brush for effective cleaning.
Can I Use Bleach To Clean My Glacier Bay Water Dispenser?
No, it’s best to avoid bleach. Use white vinegar instead, as it is safer and effective.
How Do I Clean The Water Reservoir?
Empty the reservoir, fill it with a vinegar-water mix, scrub gently, then rinse thoroughly with clean water.
Is It Necessary To Unplug The Dispenser Before Cleaning?
Yes, always unplug the dispenser before cleaning to ensure safety and avoid electrical hazards.
Conclusion
Regular cleaning keeps your Glacier Bay water dispenser efficient and safe. Follow the steps outlined to ensure a clean and fresh water supply. Regular maintenance prevents bacteria and mold buildup. Clean the exterior, too. Always use gentle cleaning agents. Remember, a clean dispenser means healthier water.
Regular cleaning extends the life of your dispenser. Keep it simple and consistent. Your health will thank you. Stay hydrated with clean water.
