
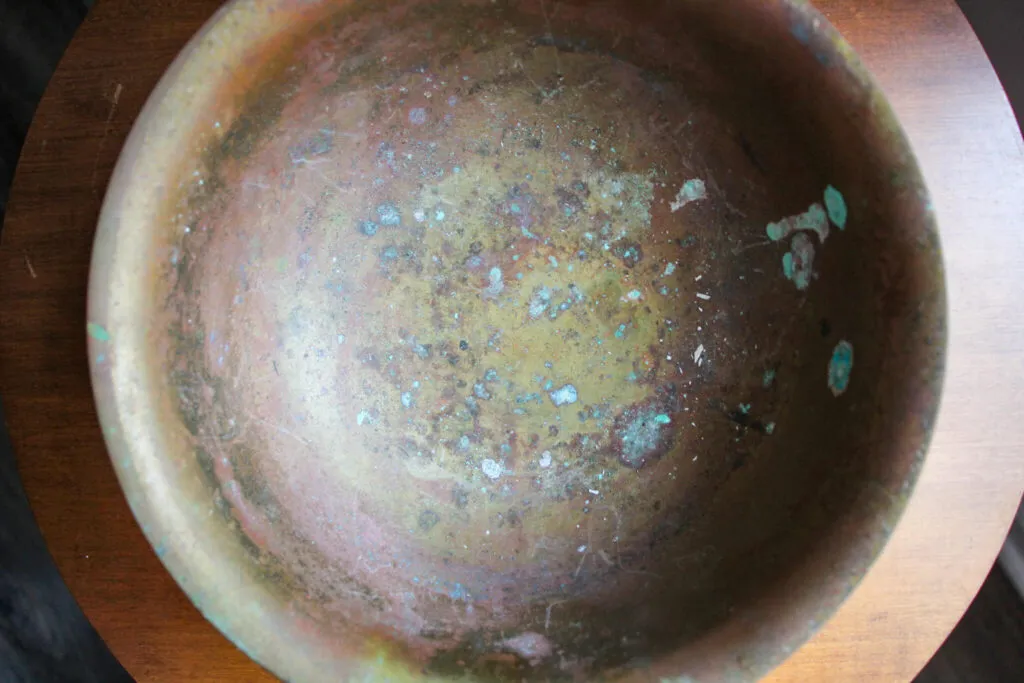
You found a beautiful brass candlestick at a flea market, and it’s begging for a shine. Maybe you can’t stand the ammonia smell of Brasso, or you’re simply out of it. **You can bring heavily tarnished brass back to life with ingredients like ketchup. Vinegar.**I’ve done this countless times on doorknobs, lamps, andeven my grandmother’s brass tray. The results can be genuinely stunning.
TL; DR**-**Test with a magnet first. If it sticks, your item is brass-plated, and harsh scrubbing will strip the thin layer in seconds.
- Ketchup’s acids (acetic and citric) dissolve copper oxide tarnish gently — it’s the safest pantry method for food-grade items.
- For heavy industrial tarnish, Bar Keepers Friend’s oxalic acid outperforms homemade mixeswithout the oily residue Brasso leaves behind.Key Quick Actions
- Test first. Dab any paste on a hidden spot. On some old lacquered brass, acids can cause a cloudy reaction in under a minute.
- Skip steel wool. The soft cloth route takes more elbow grease, but you won’t ruin fine engravings. A common regret on antique forums is over-polishing with salt.
- Seal it. A microcrystalline wax like Renaissance Wax keeps that fresh shine for years. Museum conservators swear by it.
What You’ll Need to Clean Brass Without Brasso
In practice, you don’t need a cabinet full of fancy offerings.
- White vinegar (5% acetic acid concentration)
- Fresh lemons (pH between 2.0 and 3.0 — perfect for tarnish)
- Table salt (the chloride accelerates the acid’s reaction)
- Baking soda (gentle enough to not scratch, thanks to a Mohs hardness of just 2.5)
- All-purpose flour (to create a spreadable paste)
- Plain tomato ketchup (the acidity does the heavy lifting)
- Bar Keepers Friend (for heavy-duty tarnish; it’s the pro secret)
- Soft microfiber cloths, a soft sponge, and a bit of patience
- Time commitment: 10 to 45 minutes, depending on tarnish thickness and method
Now, the step‑by‑step restoration.
Step 1: Confirm Your Brass Is Real and Not Lacquered
You must identify what you’re dealing with before you touch any cleaner. If the piece is brass‑plated or has a protective lacquer, scrubbing will damage it permanently.
Grab a magnet. Press it against the metal.
- If the magnet sticks firmly, the item is steel or iron with a thin brass plating. Very gentle cleaning only — no harsh abrasives. (A quick search of Reddit cleaning forums is filled with horror stories of people rubbing through the plating in two minutes.)
- If the magnet does not stick, you almost certainly have solid brass.
Next, check for lacquer. Look for a clear, slightly glossy coating. Quite a few modern brass pieces are lacquered to prevent tarnishing. If you see a shiny, uniform finish with no dark spots — it’s probably lacquered. You can test an inconspicuous spot with a dab of nail polish remover (though exceptions exist, naturally) (acetone). If the coating softens.Removing lacquer calls for a dedicated stripper; you can’t skip that step and expect the acids to work underneath.Why this matters:
Ammonia‑based cleaners can cause stress corrosion cracking in brass over time. A Metal Conservation Specialist noted that for long‑term preservation, mild acids or specialty waxes are far safer. So skipping Brasso isn’t just about convenience; it’s about preserving your piece.
“The best brass cleaner is already in your pantry — no ammonia, no harsh smells, just a bit of elbow grease and a lemon.”
🐦 Click to Tweet →
Step 2: Choose Your Cleaning Paste (5 Best Methods Without Brasso)
Homemade pastes work because acids in lemon juice, vinegar, and even ketchup dissolve the tarnish (copper oxide) without the need for harsh solvents. Pick the method that matches your tarnish level.
Which means anyway, here’s how each one works.
- Ketchup Method – The acetic acid in the vinegar part of ketchup, plus citric acid from tomatoes, lifts tarnish in about 15–30 minutes. Smear a thick layer over the brass, wait, then wipe. Great for small, lightly tarnished trinkets.
- Lemon and Salt – Cut a lemon in half, dip the cut side in salt, and rub directly. The chloride ions in salt turbo‑charge the acid’s oxidation stripping. Expect a 5–10 minute transformation on medium tarnish.
- Vinegar, Flour, and Salt Paste – Mix equal parts white vinegar and flour, add a teaspoon of salt to form a spreadable paste. Coat the brass and let it sit for 30 minutes; the paste clings to vertical surfaces better than liquid. Best for stubborn, dark spots.
- Baking Soda and Lemon – Make a paste of baking soda with just enough lemon juice to activate fizzing. The low‑grit soda polishes without scratching, ideal for delicate brass with fine engravings.
- Bar Keepers Friend (oxalic acid) – When nothing else works, this powder is the nuclear option. Sprinkle a little on a damp cloth, rub gently for 2–5 minutes, and rinse immediately. It removes heavy industrial tarnish with zero oily residue, which is why Reddit users call it the “holy grail” for brass hardware.
Step 3: Apply and Buff — Getting the Shine Back Without Brasso
Apply your paste with a soft cloth or sponge; never use steel wool or abrasive scouring pads. Work in small sections, and keep an eye on the clock.
- Spread the paste evenly, covering all tarnished areas. You don’t need a thick layer — a thin, even coat makes rinsing easier.
- Let it sit. For light tarnish, 5–10 minutes; for heavy tarnish, up to 30 minutes. Keep the paste moist by covering it with a damp paper towel, if needed.
- Gently buff with a circular motion using a clean, soft cloth. Add more paste if you feel grittiness, then wipe.
- Rinse thoroughly with warm water. Every speck of salt or acid left behind will cause rapid re‑tarnishing.
Why this order matters:
I once skipped the rinse step after using a vinegar paste on a brass lamp base; within 48 hours, it developed an uneven, greenish patina I definitely didn’t want. Actually, let me rephrase that – the acids hadn’t been fully neutralized, which accelerated oxidation. So, rinse like you mean it.
| Method | Active Time | Best For |
|---|---|---|
| Ketchup | 15–30 min | Small, lightly tarnished items |
| Lemon + Salt | 5–10 min | Medium tarnish; detailed work |
| Vinegar/Flour/Salt Paste | 30 min | Stubborn dark spots |
| Baking Soda + Lemon | 5 min | Gentle polish for delicate brass |
| Bar Keepers Friend | 2–5 min | Heavy industrial tarnish |
How does ketchup actually clean brass?
Ketchup contains both acetic acid (from vinegar) and citric acid (from tomatoes). These mild acids react with copper oxide tarnish, dissolving it without scratching the surface.
It’s surprisingly effective; and non‑toxic, so it’s safe for kitchen utensils. But you’ll definitely want to rinse it off completely; otherwise, the organic residue can rot in crevices and create an unpleasant smell.
Step 4: Rinse and Dry Thoroughly
After you’ve removed the paste, a proper rinse and dry is the difference between a lasting shine and immediate re‑tarnishing.
- Run the item under warm water, rubbing gently with a clean cloth to remove all paste residue.
- Immediately dry with a soft, lint‑free microfiber cloth. Any water droplets left to air‑dry will cause water spots — mild but annoying.
- For hard‑to‑reach areas, use a hair dryer on a low, cool setting to blow moisture out of tight joints.
In a lot of cases. Even a thin film of leftover moisture will tarnish brass within hours. I learned this the hard way: my first brass vase looked fantastic right after rinsing, but by the next morning, it had a dull haze. Now I double‑dry everything.
Step 5: Seal and Protect Your Shine
Preserve your hard work with a protective coating. Museum conservationists recommend a final coat of microcrystalline wax, like Renaissance Wax, to block humidity and oxygen for years.
Apply a thin layer with a soft cloth. To some extent. Let it dry to a haze, then buff. This step feels luxurious and it works. And if you can’t get wax immediately.
A light rub of mineral oil works as a temporary barrier.
Taking a step back here, without a seal. The thing is, that freshly cleaned brass will begin tarnishing again in about a week (which aligns with standard practices) in humid conditions. With wax, you might not need to re‑clean for two to three years.
Troubleshooting: When Cleaning Brass Without Brasso Goes Wrong
Even careful cleaning can produce frustrating results. Here’s how to fix the most common issues.
I’ve scrubbed too hard and now I see scratches
Stop immediately. Fine scratches can often be buffed out with a polishing cloth and a lot of patience — not more abrasive paste.
Use a dedicated brass polish (or a tiny amount of Bar Keepers Friend) only as a last resort, because you’re already close to stripping away the outer layer.
The brass turned pink or copper‑colored
To prevent it, consistently test on a hidden spot first; a quick 30‑second dab will reveal if the item is plated.
A cloudy white residue appeared after rinsing
That’s dried paste residue — usually from flour or salt. Mix a drop of mild dish soap with warm water, gently wash again, and dry instantly.
Hard water can also cause spotting, so a final wipe with distilled water helps.
The piece still smells like ketchup or vinegar
Wash the item; hmm, let me put it differently, with a mild dish soap solution and rinse a handful of times.
If the smell persists in crevices, a cotton swab with rubbing alcohol can neutralize the remaining organic acids.
People Also Ask
Does toothpaste clean brass?
Yes, toothpaste works as a mild abrasive for very light tarnish, but it’s not efficient for heavy oxidation.
The whitening grit is gentle enough, though it can leave a chalky residue. Stick to a plain white paste; gel formulas won’t do much.
Can I use Coca‑Cola to clean brass?
Coca‑Cola’s phosphoric acid can dissolve tarnish over a few hours, but the sugar leaves a sticky film that attracts dirt.
It’s messy and not recommended. Vinegar‑based pastes are far cleaner.
Will vinegar damage brass?
Undiluted vinegar left on brass for more than an hour can etch the surface, especially if the piece contains high copper content.
But a 30‑minute paste application is completely safe for solid brass. Just don’t forget to rinse.
What’s the fastest method without Brasso?
Bar Keepers Friend is the fastest — often under 5 minutes.
The oxalic acid attacks heavy tarnish immediately. Just be careful: it’s potent, and you must wear gloves.
How do I keep brass from tarnishing again?
Wax it. A single coat of microcrystalline wax like Renaissance Wax forms an invisible barrier against humidity and oxygen. Museum‑quality protection from a tiny tin.
What to Do Next
Your brass is gleaming. Now protect your work and maybe tackle the next piece with more confidence.
- Apply wax today if you haven’t already. Even a tiny container will last through dozens of projects.
- Hang a small silica gel packet in the drawer where you store brass to keep humidity low.
- Tackle a more delicate item. For antique brass where patina matters, clean brass without removing patina — because not every piece should look brand new.
Picking up that thread from before, and if you found this guide helpful. You might also want to learn how to clean a Louis Vuitton bag the right way. Delicate care is the thread that connects all these crafts.
Preserve the shine. You did this without Brasso, and that’s a win.
🔍 Research Sources
Verified high-authority references used for this article