Table of Contents
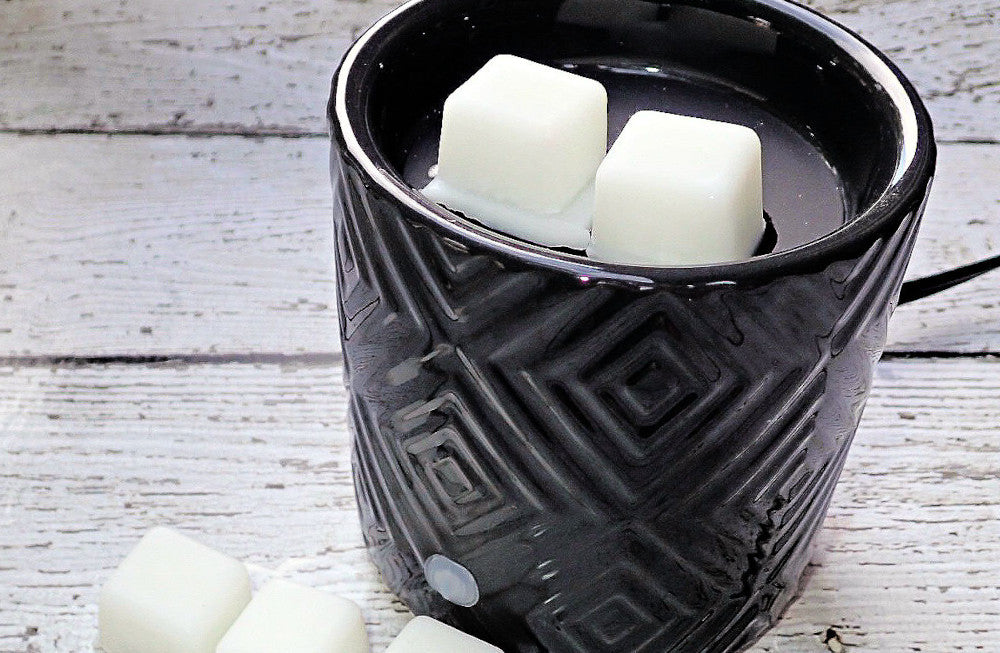
Cleaning a wax warmer pot can seem tricky. But with the right steps, it’s simple.
A clean wax warmer ensures better performance and a pleasant experience. Wax warmers collect residue over time. This affects their efficiency and the scent quality. Regular cleaning keeps your wax warmer in top condition. It also helps avoid any unpleasant odors.
In this guide, you’ll learn easy steps to clean your wax warmer pot. Following these tips will make your wax warmer last longer and work better. Let’s dive into the simple process of keeping your wax warmer pot clean and efficient.
Materials Needed
Cleaning a wax warmer pot regularly ensures it functions well and lasts longer. To do this task efficiently, you need specific materials. Below is a detailed list of the essential and optional supplies required for cleaning your wax warmer pot.
Essential Cleaning Supplies
- Paper Towels: Use these to wipe away melted wax.
- Cotton Balls: Great for absorbing any remaining wax.
- Isopropyl Alcohol: Helps to remove stubborn wax residue.
- Warm Water: Use for rinsing and initial cleaning.
- Dish Soap: Mild soap to clean the pot thoroughly.
- Plastic Scraper: Useful for scraping off hardened wax.
Optional Tools
- Q-tips: Reach tight spots and corners.
- Old Toothbrush: Scrub away tough residue.
- Microfiber Cloth: Offers a streak-free finish.
- Disposable Gloves: Protect your hands from wax and cleaning agents.
- Hair Dryer: Melt stubborn wax for easier removal.
Preparation Steps
Cleaning your wax warmer pot starts with proper preparation. These steps ensure safety and efficiency. Follow these easy steps before you begin the actual cleaning process.
Unplug The Wax Warmer
First, make sure to unplug the wax warmer. This is crucial for safety. Electrical devices can be dangerous when wet. Always disconnect them from power before cleaning.
Allow The Wax To Cool
After unplugging, allow the wax to cool down. Hot wax can burn you. Wait until the wax is solid or at room temperature. This makes it easier to handle.
Removing Excess Wax
Removing excess wax from your wax warmer pot is essential for maintaining its functionality and longevity. Whether you use it for aromatherapy or hair removal, a clean wax warmer ensures better results. Here, we’ll guide you through the process of removing excess wax efficiently.
Scraping Off Hardened Wax
First, let the wax cool and harden. This makes it easier to remove. Use a plastic scraper or an old credit card to scrape off the hardened wax. Be gentle to avoid damaging the pot. Work your way around the pot, removing as much wax as possible. This step helps prevent buildup and keeps your wax warmer efficient.
Using Paper Towels
After scraping off most of the wax, use paper towels for the next step. Turn on the wax warmer for a few minutes to soften any remaining wax. Then, turn it off and let it cool slightly, but not completely. Wipe the softened wax away with paper towels. Repeat if necessary until the pot is clean. This method is simple and effective for routine maintenance.
Deep Cleaning Methods
Keeping your wax warmer pot clean ensures better performance and longevity. Deep cleaning helps remove stubborn wax residues and keeps your pot hygienic. Let’s explore some effective deep cleaning methods.
Applying Heat For Wax Residue
Turn on the wax warmer and let it heat up. The heat will melt any remaining wax residue. Once the wax is fully melted, use a paper towel to wipe it away. Be careful not to burn yourself. You can also use a spatula to scrape off the softened wax. This method ensures most of the wax is removed easily.
Using Cleaning Solutions
For a thorough clean, use a specialized wax cleaner or rubbing alcohol. First, ensure the pot is cool. Then, apply the cleaning solution to a cloth or cotton pad. Wipe the inside of the pot carefully. This helps dissolve any leftover wax and removes any sticky residue. Avoid using harsh chemicals as they can damage the pot. Rinse the pot with warm water and dry it with a clean towel. This will leave your wax warmer pot spotless and ready for use.
Cleaning The Exterior
Keeping your wax warmer pot clean makes it look good and work better. Let’s start with the outside of the pot. This part can get dirty with dust and wax residue. A clean exterior ensures your wax warmer looks its best.
Wiping Down The Outer Surface
Start by unplugging your wax warmer pot. This step is important for safety. Use a damp cloth or a soft sponge. Gently wipe the outer surface to remove dust and dirt. For tough spots, a bit of mild soap can help. Avoid using abrasive cleaners. They can scratch the surface.
Polishing For Shine
Once the outer surface is clean, it’s time to polish. Use a soft, dry cloth for this step. Buff the exterior gently to bring out a shine. Polishing makes the wax warmer pot look new. If you want extra shine, a bit of vinegar on the cloth works well. But be careful not to get any inside the pot.
Regular cleaning and polishing keep your wax warmer looking great. Plus, it’s easy to do. Just a few minutes each week can make a big difference.
Drying And Reassembling
Cleaning a wax warmer pot can be a straightforward task. After thoroughly cleaning the pot, drying and reassembling are crucial steps. Ensuring these steps are done correctly will help maintain your wax warmer’s efficiency and longevity.
Air Drying The Components
After washing, place the wax warmer components on a clean towel. Let them air dry completely. This ensures no moisture remains, which could affect the wax’s performance. Drying naturally helps prevent any water spots or residue.
Reassembling The Wax Warmer
Once the components are dry, it is time to reassemble the wax warmer. Start by placing the base in its designated spot. Next, insert the pot back into the base. Ensure it fits snugly and securely. Finally, connect any removable parts like lids or covers.
Check that all pieces are in place before using the wax warmer again. Proper reassembly ensures the device functions correctly and safely.
Maintenance Tips
Proper maintenance of your wax warmer pot ensures its longevity and efficiency. Regular cleaning and correct storage are essential. Follow these maintenance tips to keep your wax warmer pot in top condition.
Regular Cleaning Schedule
Establishing a regular cleaning schedule is crucial. Clean your wax warmer pot after every use. This prevents wax buildup and ensures it functions properly. Here’s a simple guide:
- Turn off and unplug the wax warmer pot.
- Allow the wax to cool slightly but not harden completely.
- Use a spatula to remove excess wax.
- Wipe the pot with a paper towel or cloth.
- For stubborn residue, use a wax cleaner or mild soapy water.
- Dry thoroughly before storing or next use.
Proper Storage Techniques
Proper storage techniques extend the life of your wax warmer pot. Follow these tips:
- Ensure the pot is completely clean and dry before storing.
- Store in a cool, dry place away from direct sunlight.
- Wrap the cord neatly to avoid damage.
- Keep away from dust and moisture to prevent corrosion.
By following these maintenance tips, your wax warmer pot will stay in excellent condition. Regular care and proper storage are key to its longevity.
Frequently Asked Questions
How Often Should I Clean My Wax Warmer Pot?
Clean your wax warmer pot after every use. This prevents residue buildup and maintains efficiency.
What Tools Do I Need To Clean A Wax Warmer Pot?
You need paper towels, cotton swabs, and isopropyl alcohol. These items help remove wax and sanitize the pot.
Can I Use Water To Clean My Wax Warmer Pot?
Avoid using water. Water can damage the electrical components. Use paper towels and alcohol instead.
How Do I Remove Hardened Wax From The Pot?
Heat the pot slightly. Use a paper towel to wipe off the softened wax. Repeat if necessary.
Is It Safe To Use Chemicals For Cleaning The Pot?
Use only isopropyl alcohol. Harsh chemicals can damage the pot and affect the wax’s scent quality.
Conclusion
Cleaning your wax warmer pot doesn’t have to be a hassle. With simple steps, you can keep it in top condition. Regular cleaning ensures better performance and longer life. Always let the pot cool before cleaning. Use paper towels for easy wax removal.
Warm soapy water can help with stubborn spots. Maintain your wax warmer pot to enjoy a clean and pleasant scent experience every time. Happy cleaning!