Table of Contents
Cleaning thinset off tile can seem daunting. But it’s manageable with the right steps.
Thinset is a type of adhesive used for tiles. It dries hard and bonds strongly to surfaces. This can make removal tricky. Cleaning thinset off tiles is important for a smooth finish. Whether you’re dealing with fresh or dried thinset, knowing the right methods helps.
This guide will walk you through easy steps to clean thinset off your tiles. You’ll learn effective techniques and tools needed. Soon, your tiles will look pristine again. So, let’s dive into the process and make your tiling project look perfect.
Materials Needed
Cleaning thinset off of tile can be a challenging task. To make the job easier, you need the right materials. This section will guide you through the essential tools and recommended cleaning solutions for this task.
Essential Tools
To effectively clean thinset off of tile, gather these tools:
- Putty Knife
- Sponge
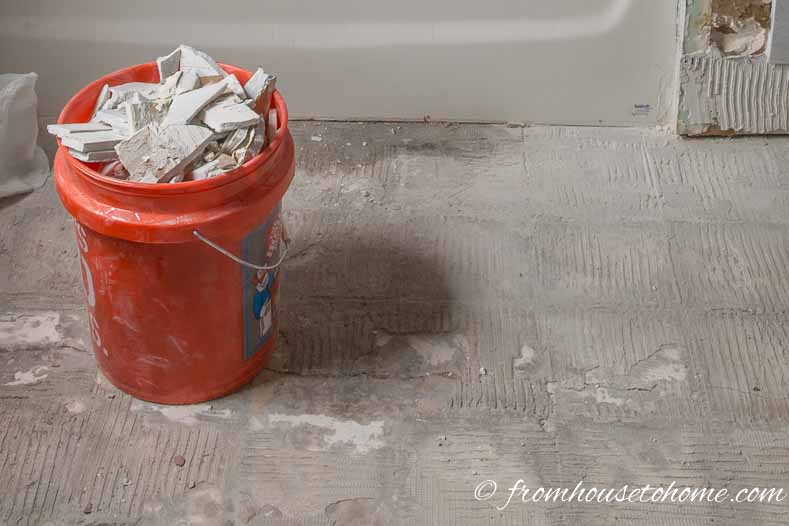
- Bucket
- Scrub Brush
- Utility Knife
- Rubber Gloves
- Safety Goggles
The putty knife helps scrape off the thinset. A sponge and bucket are necessary for rinsing. A scrub brush will help with stubborn spots. Use a utility knife for precise scraping. Always wear rubber gloves and safety goggles for protection.
Recommended Cleaning Solutions
Choose the right cleaning solution to remove thinset:
- White Vinegar
- Commercial Tile Cleaner
- Warm Water
- Dish Soap
White vinegar is a natural cleaner that can soften thinset. A commercial tile cleaner can be more effective for tough jobs. Warm water mixed with dish soap also works for light cleaning. Always test a small area first to ensure it won’t damage your tile.
Preparation Steps
Cleaning thinset off of tile can be a daunting task. Proper preparation ensures the process is smooth and effective. Below, we outline the essential preparation steps you need to follow.
Safety Precautions
Before starting, wear protective gear. Use gloves and safety glasses. Thinset contains chemicals that can harm your skin and eyes. Ensure the area is well-ventilated. Open windows or use fans to circulate air.
Area Preparation
Clear the workspace. Remove any furniture or objects near the tiles. Lay down drop cloths to protect the surrounding floor. Tape the edges of adjacent surfaces to prevent damage.
Gather necessary tools. You will need a scraper, sponge, and cleaning solution. Have a bucket of warm water ready for rinsing. This will make the cleaning process more efficient.
Inspect the tiles. Identify areas with the most thinset build-up. Focus on these sections first. This will help you manage your time better and achieve cleaner results.
Initial Cleaning
Cleaning thinset off tile can be a tedious job. But with the right steps, it becomes manageable. The initial cleaning phase is crucial. This phase focuses on removing as much loose thinset as possible. Let’s dive into the steps.
Removing Loose Thinset
Begin by clearing loose thinset. Use a stiff brush for this task. Gently scrub the tile surface. This will help dislodge any loose material. Be thorough but gentle to avoid scratching the tile.
You may also use a vacuum cleaner. This will help to remove any dust and debris. Ensure the tile surface is clear before proceeding to the next step.
Using A Scraper
After removing loose thinset, it’s time to use a scraper. Choose a plastic scraper to avoid damaging the tile. Hold the scraper at a 45-degree angle. Gently apply pressure and scrape off the thinset.
Work in small sections. Take your time to ensure you remove all the thinset. If you encounter stubborn spots, apply a bit more pressure. Always be careful not to damage the tile surface.
Once you have scraped off the thinset, use a damp cloth to wipe the tile. This will remove any residue left behind. Your tile should now be free of thinset and ready for the next steps.
Soaking Process
The soaking process is a crucial step to remove thinset from tile. It helps loosen the adhesive, making it easier to clean. Following the right steps ensures effective and safe removal.
Choosing The Right Solution
Select the correct solution to soak the tiles. A common choice is a mixture of water and vinegar. Vinegar helps break down the thinset. Alternatively, use a commercial tile cleaner for tougher jobs. Always read the instructions on the label. Some solutions can damage tiles if used improperly.
Soaking Duration
Soak the tiles for the right amount of time. Generally, 15 to 20 minutes is sufficient. For thicker layers of thinset, soak for a longer duration. Check the tiles periodically. If the thinset appears soft, it is ready for cleaning.
Scrubbing Techniques
Scrubbing thinset off of tile can be a tough task. The dried adhesive sticks stubbornly, making it tricky to remove. Using effective scrubbing techniques is key. Follow these steps for the best results.
Using A Brush
A stiff-bristle brush works best for scrubbing thinset. Choose a brush with strong, durable bristles. This helps to break the bond between the thinset and the tile. Scrub in circular motions. Focus on small areas at a time. This ensures you apply enough pressure.
Move the brush back and forth. This helps to loosen the thinset. Use a bit of water to soften the adhesive. The brush will do most of the work. Be patient. The thinset will gradually come off the tile. Repeat the process as needed until the tile is clean.
Applying Elbow Grease
Sometimes, a bit of elbow grease is necessary. Use your body weight to apply more pressure. This increases the effectiveness of your scrubbing. Don’t rush. Take your time for the best results.
Switch hands if you get tired. This ensures you maintain consistent pressure. Rest between scrubbing sessions. This prevents fatigue and improves efficiency. Remember, patience and persistence are key. The thinset will eventually come off.
Final Rinse
Cleaning thinset off tile requires a thorough process. The final rinse is crucial. It ensures no residue remains. This step will make your tiles look pristine and polished.
Water Rinse
Start with a clean bucket of water. Use a sponge dipped in the water. Gently wipe each tile. Make sure the sponge is damp, not soaked. This prevents water from pooling on the tiles.
Rinse the sponge frequently. This helps remove any remaining thinset. Continue until all tiles are wiped down. This step ensures a clean surface. No residue should remain.
Drying The Tiles
After rinsing, dry the tiles. Use a clean, dry cloth. Wipe each tile thoroughly. This prevents water spots. It also ensures a streak-free finish.
Let the tiles air dry for a few minutes. Inspect the tiles for any missed spots. If needed, repeat the rinse and dry process. Your tiles should now be clean and shiny.
Dealing With Stubborn Thinset
Removing stubborn thinset from tiles can be challenging. It requires patience and the right tools. Sometimes, simple scraping won’t suffice. You need to employ stronger methods. In this section, we’ll explore chemical removers and power tools.
Chemical Removers
Chemical removers can break down tough thinset. These products are available at most hardware stores. They work by softening the thinset. This makes it easier to remove. Follow the instructions on the label. Use gloves and safety glasses for protection. Apply the remover to the thinset. Let it sit for the recommended time. Scrape off the softened thinset with a putty knife.
Power Tools
Power tools can speed up thinset removal. An angle grinder with a diamond blade is effective. It grinds away the thinset quickly. Wear safety gear to protect yourself from dust. A rotary tool with a grout removal attachment can also help. These tools are precise and work in tight spaces. Ensure you use the right attachment for the job. Always follow the manufacturer’s instructions.
Post-cleaning Care
After successfully cleaning thinset off your tiles, it’s crucial to focus on post-cleaning care. This ensures your tiles remain in great condition. Proper care helps prevent future issues and keeps your tiles looking their best. Let’s explore some important steps in post-cleaning care.
Tile Inspection
Inspect your tiles carefully for any remaining residue. Check all the corners and edges. Even a small amount of thinset can cause problems later. Make sure every tile is clean and smooth. Look for any signs of damage or discoloration. Address these issues immediately to prevent further damage.
Preventive Measures
Seal your tiles after cleaning to protect them. A good sealant can prevent stains and make future cleaning easier. Choose a sealant that suits your tile type. Apply the sealant as per the instructions. This simple step can save you a lot of trouble in the long run.
Maintain a regular cleaning routine. Wipe your tiles with a damp cloth regularly. Avoid harsh chemicals that can damage the tile surface. Use gentle, tile-friendly cleaners to keep them looking new.
Place mats or rugs in high-traffic areas. This prevents dirt and debris from scratching your tiles. It also reduces the wear and tear on your flooring. These small steps can make a big difference in maintaining your tiles.
Frequently Asked Questions
How Do You Remove Dried Thinset From Tile?
Use a scraper or putty knife to gently scrape off dried thinset. Be careful not to damage the tile.
Can Vinegar Remove Thinset From Tiles?
Yes, vinegar can help. Soak a cloth in vinegar, place it on the thinset, and let it sit for a few hours.
Is It Safe To Use A Power Tool To Clean Thinset?
Yes, but use a tool with a gentle setting, like an oscillating tool. This prevents tile damage.
What Household Items Can Help Clean Thinset?
Vinegar, baking soda, and warm water are helpful. They soften the thinset, making it easier to remove.
How Long Does It Take To Clean Thinset Off Tiles?
It depends on the amount. Typically, it takes a few hours to a day. Patience is key.
Conclusion
Cleaning thinset off tile can seem daunting, but it’s manageable. Start with the right tools. Scrape away dried thinset carefully. Use water and a sponge for final touches. Remember to work gently to avoid damage. Take your time and stay patient.
With these steps, your tiles will look great again. Keep your tools handy for future projects. Happy cleaning!