Table of Contents
To clean a snowblower carburetor, carefully disassemble it, soak in carburetor cleaner, and reassemble for optimal performance. Cleaning a snowblower carburetor is a straightforward process that can help maintain the engine’s efficiency and extend its lifespan.
Snowblowers often experience clogged or dirty carburetors due to fuel impurities or improper storage practices. By following the proper cleaning steps, you can ensure that your snowblower operates smoothly during the winter season. Regular maintenance, such as cleaning the carburetor, is essential for keeping your snowblower in top condition and ready for use whenever needed.
Now, let’s delve deeper into the specifics of how to effectively clean a snowblower carburetor to keep your equipment running efficiently.
Preparing For Cleaning
Before you begin the process of cleaning your snowblower carburetor, it’s essential to gather all the necessary tools. Having the right tools will make the process more efficient and ensure that you have everything you need within arm’s reach. Here are the tools you’ll need:
Gather The Necessary Tools:
- A socket wrench
- A screwdriver set
- A clean cloth or towel
- A small container to catch fuel
- Carburetor cleaner spray
- Compressed air
- A brush or toothbrush for scrubbing
Take a moment to check if you have all these tools nearby. Having them handy will save you time and prevent any unnecessary interruptions during the cleaning process.
Disconnect The Spark Plug:
Before working on your snowblower carburetor, it’s crucial to disconnect the spark plug. This step is essential for your safety, as it will prevent any accidental engine starts during the cleaning process. Follow these steps to disconnect the spark plug:
- Locate the spark plug wire on the top of the snowblower engine.
- Gently pull the rubber boot covering the spark plug to expose it.
- Use a socket wrench to remove the spark plug by turning it counterclockwise.
- Once the spark plug is removed, keep it in a safe and clean area.
By disconnecting the spark plug, you eliminate the risk of the engine accidentally starting while you’re working on the carburetor.
Now that you have gathered the necessary tools and disconnected the spark plug, you’re ready to move on to the next step, which is dismantling the carburetor.

Accessing The Carburetor
When it comes to cleaning your snowblower carburetor, accessing it is the first step. This is an important task to ensure your snowblower continues to run efficiently during the winter months. Here are the steps to access the carburetor and begin the cleaning process.
Locate The Carburetor
First, you need to locate the carburetor on your snowblower. The location can vary depending on the make and model of your machine, so consult the user manual if you’re having trouble finding it.
Remove Any Covers Or Housings
Before you can access the carburetor, you may need to remove any covers or housings that are concealing it. These can typically be unscrewed with a screwdriver or a socket wrench, allowing you to easily access the carburetor for cleaning.
Removing The Carburetor
Removing the Carburetor:
Disconnect Fuel Lines And Choke Linkage:
Start by disconnecting the fuel lines and choke linkage from the carburetor.
Unbolt The Carburetor:
Proceed to unbolt the carburetor, ensuring to keep track of each bolt removed.
Place the bolts in a secure location to prevent them from getting lost.
Handle the carburetor with care to avoid causing damage during removal.
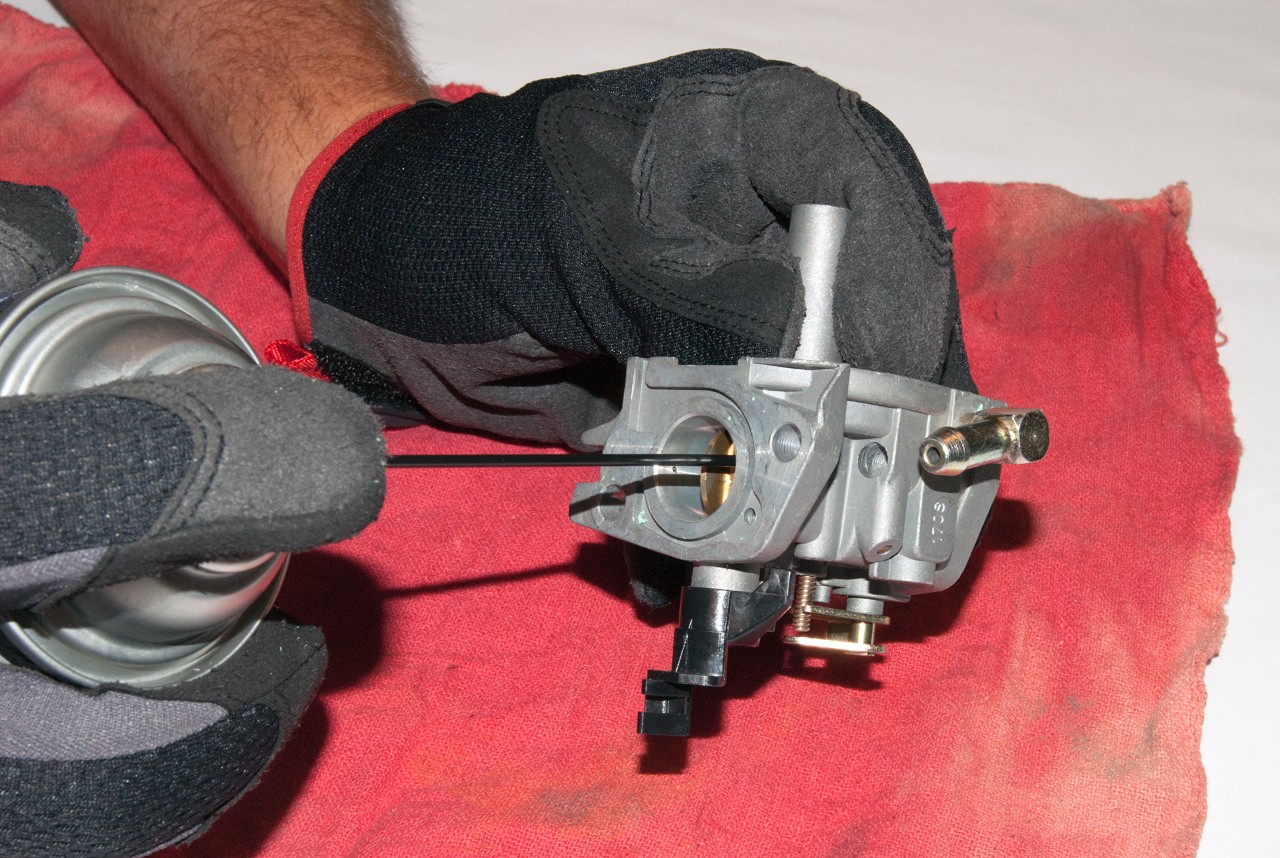
Cleaning The Carburetor
Regular maintenance of your snowblower’s carburetor is essential for smooth operation. Cleaning the carburetor can help improve fuel efficiency and prevent engine issues.
Use A Carburetor Cleaner
When cleaning the carburetor, make sure to use a specialized carburetor cleaner to effectively remove any built-up debris or varnish.
Clean Individual Components
Begin by disassembling the carburetor and cleaning each component separately to ensure a thorough and effective cleaning process.
Reassembling And Testing
After thoroughly cleaning the snowblower carburetor, the next crucial steps are reassembling the parts and testing the machine to ensure it runs smoothly. Proper reassembly is essential to ensure the carburetor functions optimally, and testing the snowblower is necessary to verify the success of the cleaning process.
Reinstall The Carburetor
When reinstalling the carburetor, ensure all components are put back together correctly. It’s crucial to carefully follow the disassembly steps in reverse, making sure each part is fitted securely. Referencing the snowblower manual can help ensure the proper reassembly of the carburetor.
Test The Snowblower, Ensuring
After reassembling the carburetor, it’s time to test the snowblower to ensure it operates effectively. Check for smooth starting, idling, and reliable performance during operation. If the snowblower struggles to start or doesn’t run smoothly, it may indicate a problem with the carburetor that requires further attention.
Conclusion
Cleaning a snowblower carburetor is essential for maintaining its performance. By following the step-by-step process outlined in this guide, you can ensure that your snowblower operates efficiently and effectively, especially during the winter season. Regular maintenance and cleaning will not only prolong the lifespan of your snowblower but also save you time and money in the long run.
Keep your equipment in top shape, and it will serve you well for many winters to come.
