Table of Contents
Cleaning your O2 oxygen sensor can improve your car’s performance and fuel efficiency. It’s a simple process you can do at home.
Oxygen sensors monitor the air-fuel ratio in your engine. Over time, they can get dirty, affecting their accuracy. This can lead to poor fuel economy, increased emissions, and a check engine light. Regular cleaning can prevent these issues. In this guide, we will show you how to clean your O2 oxygen sensor step-by-step.
You don’t need many tools, and the process is straightforward. Follow our tips to keep your car running smoothly and efficiently. Let’s get started!
Gathering Supplies
Before cleaning your O2 oxygen sensor, you need to gather some supplies. Having the right tools and solutions is crucial. It ensures you can do the job safely and effectively. Let’s break down what you need.
Tools Needed
First, gather the necessary tools. You will need a wrench or socket set to remove the sensor. A wire brush is helpful for scrubbing. Also, get a clean cloth for wiping down parts. Safety gear like gloves and goggles is important too.
Cleaning Solutions
Next, you need the right cleaning solutions. Use a commercial oxygen sensor cleaner. Alternatively, a mixture of gasoline and detergent can work. Ensure you have a container to hold the solution. A small bowl or cup will do. Always read the cleaner’s instructions for safety.
Safety Precautions
Cleaning an O2 oxygen sensor is essential to maintain your vehicle’s performance. To ensure your safety during this process, follow these crucial Safety Precautions. Read on to understand the importance of protective gear and proper ventilation.
Protective Gear
Wearing the right protective gear is vital when cleaning an O2 sensor. This gear helps protect you from harmful chemicals and debris. Ensure you have the following:
- Gloves: Protect your hands from chemicals and dirt.
- Safety Glasses: Shield your eyes from splashes and particles.
- Mask: Prevent inhaling toxic fumes during the cleaning process.
These items will keep you safe and reduce the risk of injury. Always make sure your gear is in good condition before starting.
Ventilation
Proper ventilation is crucial when cleaning an O2 sensor. Clean the sensor in a well-ventilated area to avoid inhaling harmful fumes. Follow these tips:
- Work in an open space or garage with the doors open.
- Use fans to circulate air and disperse fumes.
- Avoid working in confined spaces without adequate airflow.
Good ventilation ensures you stay safe from hazardous chemicals. Always prioritize fresh air when working with cleaning agents.
Locating The O2 Sensor
Before you can clean your O2 Oxygen Sensor, you need to find it. The sensor’s location varies by vehicle type. Knowing where to look is crucial. This guide will help you locate the O2 sensor in your vehicle.
Vehicle Manual Reference
The first step is to check your vehicle’s manual. The manual contains detailed information about your vehicle’s components. Look for the section on the exhaust system. You will often find a diagram showing the exact location of the O2 sensor. If you don’t have a physical copy, many manufacturers offer digital versions online.
Sensor Position
O2 sensors are usually found in the exhaust manifold or along the exhaust pipe. You might have more than one sensor. Common positions include:
- Before the catalytic converter (upstream)
- After the catalytic converter (downstream)
Here is a simple table to help you identify common sensor positions:
| Sensor Type | Location |
|---|---|
| Upstream | Before the catalytic converter |
| Downstream | After the catalytic converter |
Identifying the correct sensor is important. Use the vehicle manual and this guide to ensure accuracy.
Removing The O2 Sensor
Cleaning your car’s O2 sensor starts with removing it. This step is crucial for access and proper cleaning. Follow the steps below for a smooth process.
Disconnecting Battery
First, disconnect the battery to prevent any electrical issues. Use a wrench to remove the negative cable from the battery terminal. This step ensures safety and prevents short circuits.
Unplugging The Sensor
Locate the O2 sensor near the exhaust manifold. It looks like a small plug with wires attached. Gently pull the wiring harness to unplug the sensor. Be careful not to damage the wires or connectors.
Cleaning The O2 Sensor
Cleaning an O2 sensor is crucial for your car’s performance. A dirty oxygen sensor can lead to poor fuel efficiency and higher emissions. Follow these steps to clean the sensor and maintain your vehicle’s health.
Soaking The Sensor
To start, remove the O2 sensor from your vehicle. Place it in a container filled with gasoline or carb cleaner. Allow the sensor to soak for at least 1 hour. This helps dissolve carbon deposits and other contaminants.
After soaking, gently shake the container to loosen any remaining deposits. Carefully remove the sensor and let it air dry. Ensure it is completely dry before reinstallation.
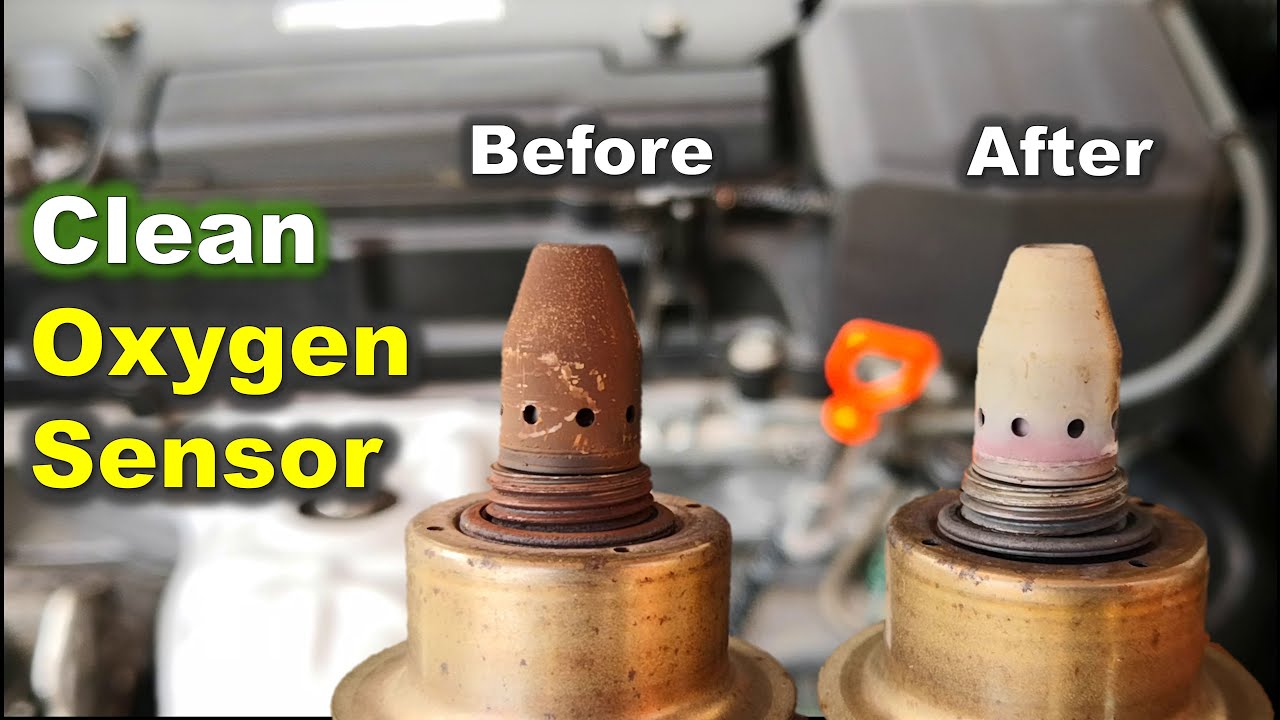
Scrubbing Off Deposits
Once the sensor is dry, use a soft-bristle brush to scrub off any remaining deposits. Be gentle to avoid damaging the sensor. Focus on the sensor tip and any visible openings.
If deposits are stubborn, you can use a small amount of carb cleaner on the brush. Avoid using excessive force. This could damage the delicate parts of the sensor.
After scrubbing, inspect the sensor for any remaining debris. If clean, reinstall the sensor into your vehicle. This should improve performance and fuel efficiency.
Reinstalling The O2 Sensor
After cleaning, the next step is reinstalling the O2 sensor. This process is crucial to ensure your vehicle runs efficiently. Follow these steps to properly reinstall the sensor.
Reconnecting The Sensor
Ensure the sensor is dry before reconnecting it. Insert the sensor into its port. Turn it clockwise until it is hand-tight. Use a wrench to secure it further. Do not overtighten.
Next, reconnect the electrical connector. Align the plug and socket. Push them together until you hear a click. This ensures a secure connection. Double-check to ensure it’s properly connected.
Securing The Wiring
Properly securing the wiring is essential. Loose wires can cause damage. Use zip ties to fasten the wires to nearby components. Ensure the wires are not touching hot engine parts. This prevents melting or damage.
Check for any loose or exposed wires. If found, use electrical tape to cover them. This protects the wiring and ensures durability. Properly secured wires ensure the sensor works correctly.
By following these steps, you ensure your O2 sensor is reinstalled correctly. This helps maintain your vehicle’s performance and efficiency.
Testing The Sensor
Testing the sensor is a crucial step in ensuring your O2 oxygen sensor is functioning correctly. This process helps identify if the sensor requires cleaning or replacement. Follow these steps to test your O2 oxygen sensor effectively.
Starting The Vehicle
First, you need to start the vehicle. Let it run for a few minutes. This allows the sensor to reach its operating temperature. It also ensures accurate readings during the test.
Checking For Error Codes
Next, use an OBD-II scanner to check for error codes. Connect the scanner to the vehicle’s diagnostic port. This port is usually located under the dashboard. Turn the ignition to the ‘on’ position without starting the engine. The scanner will read the error codes.
Look for codes related to the O2 sensor. Common codes include P0130, P0131, and P0132. These codes indicate issues with the sensor’s performance. Write down any codes you find. This information will help you determine the next steps.
Interpreting The Results
After identifying the error codes, interpret the results. If the codes indicate a faulty sensor, you may need to clean or replace it. Use the vehicle’s manual to understand the specific codes better. This will guide you on the necessary actions to take.
In some cases, the issue may not be with the sensor itself. It could be related to wiring or other components. Ensure you inspect these areas too. Addressing all potential issues will help restore the sensor’s optimal performance.
Regular testing of your O2 oxygen sensor is essential for maintaining your vehicle’s efficiency. By following these steps, you can ensure your sensor is working correctly. This will help you avoid potential engine issues and improve fuel economy.
Maintenance Tips
Maintaining your O2 oxygen sensor is crucial for your vehicle’s performance. Regular maintenance can prevent costly repairs and ensure a longer lifespan for the sensor. Here are some essential tips to keep your O2 sensor in top condition.
Regular Inspection
Inspect your O2 sensor regularly. Check for any signs of damage or wear. Look for corrosion, dirt, or debris on the sensor. A clean sensor works more efficiently and accurately. Regular inspection helps you spot problems early.
Using Quality Fuel
Using quality fuel can extend the life of your O2 sensor. Poor quality fuel can leave deposits on the sensor, affecting its performance. Cleaner fuel means less buildup and better sensor function. Choose fuel with fewer additives for a cleaner engine.
Frequently Asked Questions
What Tools Do I Need To Clean An O2 Sensor?
You need a socket wrench, O2 sensor cleaner, and a wire brush.
Can You Clean An O2 Sensor Without Removing It?
No, you must remove it for proper cleaning.
How Often Should An O2 Sensor Be Cleaned?
Clean it every 30,000 miles or if you notice performance issues.
What Are The Signs Of A Dirty O2 Sensor?
Poor gas mileage, rough idling, and engine warning light are common signs.
Can A Dirty O2 Sensor Cause Engine Problems?
Yes, it can lead to poor performance and increased emissions.
Conclusion
A clean O2 sensor ensures better engine performance. Regular maintenance extends its life. Always use proper cleaning tools and solutions. Avoid harsh chemicals to prevent damage. Follow the steps carefully for effective cleaning. Save money by doing it yourself. Enjoy a smoother, more efficient ride.
Happy driving!