Table of Contents
Cleaning cassette heads is essential for optimal audio performance. Dirty heads can cause poor sound quality and tape damage.
Maintaining your cassette player is key to enjoying clear, crisp audio. Over time, dust and residue accumulate on the heads, affecting playback. Regular cleaning ensures your tapes sound their best and prolongs the life of your player. This guide will show you easy steps to keep your cassette heads clean.
Follow along to learn how to care for your equipment and enjoy your favorite music without any hitches. Let’s dive into the simple process of cleaning cassette heads for the best audio experience.
Introduction To Cassette Heads
Cassette heads need regular cleaning for clear sound. Gently use a cotton swab with alcohol to remove dirt. Repeat monthly for best results.
Cassette players have made a comeback. They bring nostalgia and a unique sound experience. But to enjoy the best sound, maintenance is crucial. Cleaning cassette heads is a key part of this. Cassette heads read the magnetic tape. Over time, they collect dust and dirt. This can affect sound quality and damage tapes. Regular cleaning ensures your music sounds great.
Importance Of Clean Heads
Dirty cassette heads can cause many problems. Tapes may skip or get stuck. You might hear muffled or distorted sounds. Dirt can even wear out your tapes faster. Clean heads mean fewer issues. They also extend the life of your tapes and player.
Impact On Sound Quality
Clean heads provide clear and crisp sound. Dust and debris can block the tape’s signal. This leads to poor audio quality. Regular cleaning removes these obstructions. Your music will sound as it should. Every detail of the recording will come through. Enjoy your favorite tunes with the best possible sound.
“`
Tools And Materials Needed
To clean cassette heads effectively, you need the right tools and materials. These will ensure a thorough and safe cleaning process. Below are the essential items you need to get started.
Essential Cleaning Tools
First, gather a few essential cleaning tools. A small, soft-bristled brush is crucial. It helps remove dust and dirt. Cotton swabs are also useful. They can reach tight spaces without causing damage. A lint-free cloth is necessary too. It keeps surfaces clean and free of fibers.
Recommended Cleaning Solutions
Next, choose the right cleaning solutions. Isopropyl alcohol is highly recommended. It cleans effectively and evaporates quickly. Aim for a solution with 90% purity or higher. You can also use a commercial head-cleaning fluid. These products are designed specifically for cassette heads. They ensure safe and efficient cleaning.
Preparing For Cleaning
Cleaning cassette heads ensures better sound quality and prolongs the life of your cassette player. Preparation is key to effective cleaning. This section guides you through the necessary steps.
Safety Precautions
Always unplug the cassette player before cleaning. This prevents electrical shocks. Use gloves to protect your hands from cleaning chemicals. Ensure the room is well-ventilated. This helps avoid inhaling any fumes from the cleaning solution.
Setting Up Your Workspace
Choose a flat, stable surface for your workspace. Lay down a clean cloth to catch any drips. Gather all necessary tools and cleaning supplies. These include cotton swabs, isopropyl alcohol, and a small flashlight. Organize everything within easy reach. This will make the process smoother and quicker.
Step-by-step Cleaning Process
Cleaning cassette heads is essential for maintaining sound quality. Proper care ensures longevity and optimal performance. Follow this guide to learn the step-by-step cleaning process for your cassette deck.
Disassembling The Cassette Deck
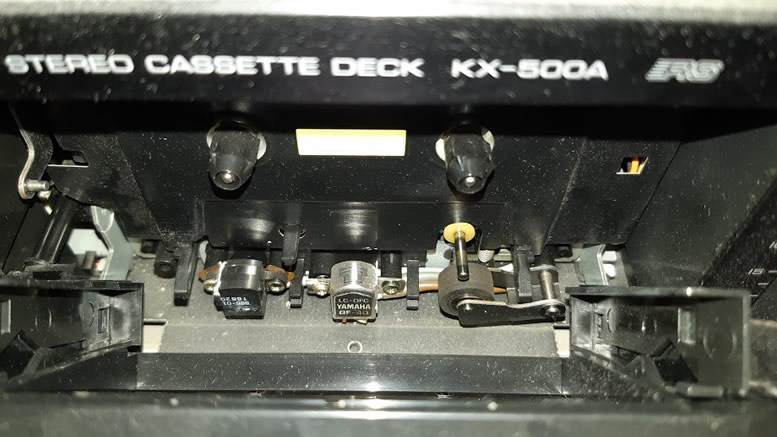
Start by unplugging your cassette deck. Remove any tapes and disconnect from power. Use a screwdriver to carefully remove the outer case. Keep track of all screws and small parts. Place them in a safe spot. Once opened, locate the cassette heads. They are usually at the center of the deck.
Cleaning The Heads
Use isopropyl alcohol with a purity of 90% or higher. Pour a small amount onto a cotton swab. Gently clean the heads with the moistened swab. Avoid excessive pressure. Rotate the swab to use a fresh area. Clean all visible areas on the heads. Use a dry swab to remove any residue. Repeat the process if needed.
Reassembling The Deck
Once the heads are clean, reassemble the deck. Carefully place all screws back in their original spots. Ensure the outer case is secure. Double-check connections and screws. Reconnect to power and test with a cassette tape. Listen for improved sound quality.
Common Mistakes To Avoid
Cleaning cassette heads is crucial for maintaining your audio equipment. But, many people make mistakes that can damage their gear. Knowing what to avoid will help you clean cassette heads properly and safely.
Using Incorrect Solutions
Using the wrong cleaning solution can harm your cassette heads. Avoid alcohol-based solutions as they can dry out the heads. Instead, use a cleaner specifically designed for cassette heads. Always read the label to ensure it is safe for your equipment.
Using homemade cleaners can also be risky. Stick to products made for electronics. This ensures you do not introduce harmful chemicals to your device. Below is a table of recommended and non-recommended solutions:
| Recommended Solutions | Non-Recommended Solutions |
|---|---|
| Electronics Cleaner | Isopropyl Alcohol |
| Specialized Cassette Head Cleaner | Homemade Mixtures |
Applying Excessive Pressure
Do not apply too much pressure when cleaning the heads. Cassette heads are delicate. Using excessive force can damage them. Use a light touch and gentle movements.
Using tools that are too hard or abrasive is also a bad idea. Soft cloths or specialized cleaning tools are best. Here are some tips to avoid applying too much pressure:
- Use a soft, lint-free cloth.
- Make gentle, circular motions.
- Avoid scrubbing or pressing down hard.
By following these guidelines, you can keep your cassette heads clean and working well without causing damage.
Maintaining Cassette Heads
Keeping your cassette heads clean ensures a longer lifespan for your tapes. Regular maintenance can also improve the sound quality. This guide will help you with easy tips and tricks. Follow these steps to keep your cassette heads in top shape.
Regular Cleaning Schedule
Establish a regular cleaning schedule for your cassette player. Clean the heads every 20-30 hours of use. Use a cotton swab and isopropyl alcohol. Gently wipe the heads to remove dirt and grime. Avoid using too much alcohol. Let the heads dry before using the player again.
Proper Storage Tips
Store your cassette player in a cool, dry place. Avoid direct sunlight and high humidity. Keep cassettes in their cases to prevent dust accumulation. Store them vertically to avoid damage. Regularly check your storage area for dust and moisture.
Troubleshooting Sound Issues
Troubleshooting sound issues with cassette players can be frustrating. Often, the problem lies with dirty cassette heads. Regular cleaning helps maintain sound quality and prolongs the player’s lifespan. Below, we discuss how to identify dirty heads and when to seek professional help.
Identifying Dirty Heads
Dirty cassette heads cause distorted or muffled sound. If you notice a drop in sound quality, it’s time to check the heads. Open the cassette player and locate the heads. They are small, metal components that read the tape. Inspect them for dirt or residue. A flashlight can help you see better. If the heads look dirty, they need cleaning.
When To Seek Professional Help
Sometimes, cleaning the heads may not solve the problem. If sound issues persist, professional help is needed. Technicians have the tools and expertise to fix complex problems. They can also check for other issues, like worn-out belts or damaged components. Seeking help ensures your player works correctly and lasts longer.
Advanced Cleaning Techniques
Cleaning cassette heads can be a delicate task. Basic methods might not always do the trick. Advanced techniques offer a deeper clean. These methods ensure better audio quality and longer tape life.
Using Specialized Tools
Specialized tools can help clean cassette heads more effectively. Here are some useful tools:
- Head Demagnetizers: Removes magnetic buildup, improving audio clarity.
- Cleaning Cassettes: Cassette-shaped tools with a cleaning tape inside.
- Fine Brushes: Soft brushes to remove dust and dirt gently.
Using these tools is easy. Follow the instructions provided with each tool. They ensure a thorough cleaning, enhancing the performance of your cassette player.
Deep Cleaning Methods
Sometimes, cassette heads need more than a surface clean. Deep cleaning is essential for persistent dirt or residue. Follow these methods:
- Disassemble the Player: Open the cassette player carefully. Refer to the manual for guidance.
- Clean Heads with Isopropyl Alcohol: Use a cotton swab dipped in isopropyl alcohol. Gently wipe the heads.
- Clean Capstans and Rollers: These parts also gather dirt. Clean them with alcohol and a swab.
- Reassemble and Test: Put the player back together. Test with a cassette to ensure it works well.
Deep cleaning methods provide a more comprehensive clean. They help restore the player to its optimal condition.
Frequently Asked Questions
How Often Should I Clean Cassette Heads?
Clean cassette heads every 20-30 hours of playtime. This prevents sound quality issues.
What Tools Do I Need To Clean Cassette Heads?
You need a cotton swab, isopropyl alcohol, and a soft cloth. Simple and effective.
Can I Use Water To Clean Cassette Heads?
No, water can damage cassette heads. Use isopropyl alcohol for safe cleaning.
How Do I Know If Cassette Heads Need Cleaning?
Look for muffled sound or loss of clarity. These are signs heads need cleaning.
Is It Safe To Use A Cleaning Cassette?
Yes, but manual cleaning with a cotton swab and alcohol is more thorough.
Conclusion
Cleaning cassette heads is crucial for great sound quality. Regular maintenance ensures optimal performance. Use the right tools and follow steps carefully. Avoid harsh chemicals to prevent damage. Clean heads every 30 hours of use. Enjoy better audio and longer cassette life.
Keep your music sounding clear and crisp. Happy listening!