Table of Contents
Cleaning a Camelbak bladder is essential for maintaining hygiene. A clean bladder ensures safe hydration during your adventures.
Camelbak bladders are convenient for outdoor activities. But, they can become breeding grounds for bacteria if not cleaned properly. Regular cleaning can prevent mold and bacteria buildup. This guide will help you clean your Camelbak bladder effectively. We’ll walk you through simple steps to keep your hydration pack fresh.
With these tips, you’ll enjoy clean, safe water on all your outdoor excursions. Let’s dive into the cleaning process and keep your Camelbak bladder in top condition!
Introduction To Camelbak Bladders
Camelbak bladders are essential for hikers, cyclists, and outdoor enthusiasts. They provide easy access to hydration without the need for constant water breaks. Ensuring your Camelbak bladder stays clean is crucial for maintaining its functionality and your health.
Purpose And Benefits
The primary purpose of a Camelbak bladder is to deliver hydration efficiently. The bladder’s design allows users to drink without stopping their activities. This feature is especially beneficial during intense exercises or long hikes.
Another advantage is the Camelbak bladder’s capacity. It can hold a significant amount of water, reducing the need for frequent refills. This convenience allows users to focus on their activities. Plus, the bladder fits comfortably in a backpack, distributing weight evenly.
Common Issues
Despite its benefits, the Camelbak bladder can face some common issues. One of the most frequent problems is mold and bacteria build-up. This occurs if the bladder is not cleaned and dried properly after use. Mold can affect the water’s taste and pose health risks.
Another issue is the lingering taste of sports drinks or flavored water. These flavors can be hard to remove and can make plain water taste unpleasant. Regular cleaning helps prevent this issue. Leaks and punctures are also common, so check the bladder regularly for any signs of wear and tear.
Necessary Cleaning Supplies
Keeping your Camelbak bladder clean is essential for health and longevity. Proper cleaning supplies make the task easier and more effective. Here’s a detailed guide on the necessary cleaning supplies you need.
Essential Tools
To clean your Camelbak bladder, gather the following tools:
- Cleaning brush kit: Includes a long brush for the bladder and a small brush for the tube.
- Drying rack: Keeps the bladder open for proper drying.
- Dish soap: Mild, unscented soap is best.
- Hydration cleaning tablets: Specifically designed for hydration systems.
Recommended Cleaning Solutions
Using the right cleaning solutions ensures your Camelbak bladder stays fresh and safe. Here are some recommended solutions:
- White vinegar solution: Mix one part vinegar with three parts water. It disinfects and removes odors.
- Baking soda solution: Combine two tablespoons of baking soda with one liter of water. It helps in removing stubborn stains.
- Lemon juice: Mix lemon juice with water for a natural, fresh-smelling cleaner.
Having these tools and solutions on hand will make cleaning your Camelbak bladder a breeze. Regular cleaning ensures you enjoy fresh, safe water on all your adventures.
Initial Rinse
Cleaning your Camelbak bladder properly starts with an initial rinse. This step is crucial to remove any residual liquids and debris. Proper rinsing ensures your bladder is ready for a thorough clean. Let’s break down the process into simple steps.
Emptying The Bladder
First, empty your Camelbak bladder completely. Open the cap and pour out any remaining liquid. Squeeze the bladder gently to remove every last drop. This prevents mold and bacteria from growing inside.
Rinsing With Warm Water
Next, rinse the bladder with warm water. Fill it about halfway with warm, not hot, water. Close the cap and shake the bladder for about 30 seconds. This helps to dislodge any particles stuck inside.
- Fill halfway with warm water
- Close the cap tightly
- Shake for 30 seconds
Once shaken, pour out the water. Repeat this process if the water is still dirty. It might take a few rinses to get it clean. Remember, warm water is your best friend during this step.
After rinsing, inspect the bladder. Ensure no residue or dirt remains inside. A clean bladder means a fresh, safe hydration system for your next adventure.
Deep Cleaning Techniques
Keeping your Camelbak bladder clean ensures fresh-tasting water. Regular cleaning is crucial, but deep cleaning can make a significant difference. Here are some deep cleaning techniques to keep your Camelbak bladder in top condition.
Using Cleaning Tablets
Cleaning tablets are easy to use and effective. Fill the bladder with warm water. Drop in one or two cleaning tablets. Let it sit for about 15 minutes. Shake the bladder gently during this time. Rinse thoroughly with clean water. Dry completely before storing.
Cleaning With Baking Soda And Vinegar
Baking soda and vinegar are natural cleaners. Fill the bladder halfway with warm water. Add two tablespoons of baking soda. Close and shake the bladder. Empty the solution. Fill the bladder again with warm water. Add two cups of white vinegar. Close and shake. Let it sit for 15 minutes. Rinse thoroughly with clean water. Dry completely before storing.
Cleaning The Tube And Bite Valve
Keeping your Camelbak bladder clean is essential for a fresh taste and long life. The tube and bite valve can harbor bacteria and mold if not cleaned regularly. This section will guide you through the steps needed to clean these vital parts.
Removing The Tube
Start by removing the tube from the bladder. This usually involves a simple twist and pull motion. Check your Camelbak’s manual for specific instructions. Disconnect the bite valve from the tube by gently pulling it off.
Cleaning Inside The Tube
Use a tube brush to scrub inside the tube. Insert the brush at one end and push it through to the other end. This will help remove any buildup and debris.
- Rinse the tube with warm water.
- Use mild soap if needed.
- Rinse thoroughly to remove all soap residue.
Sanitizing The Bite Valve
Sanitize the bite valve to kill bacteria and mold. Here are some methods:
- Soak the bite valve in a solution of 1 part white vinegar to 3 parts water for about 20 minutes.
- Rinse thoroughly with warm water.
- Let it air dry completely before reattaching.
For a deeper clean, you can use a small brush to scrub the inside of the bite valve. This ensures all hidden areas are reached.
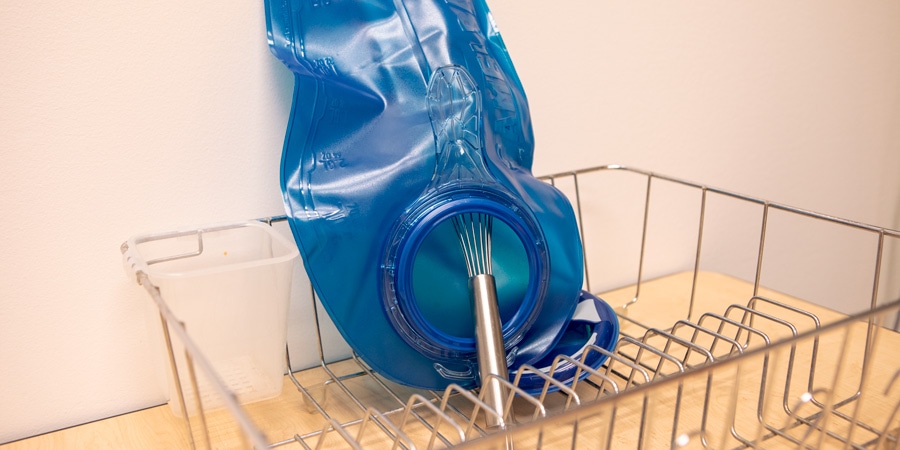
Drying The Bladder Properly
Properly drying your Camelbak bladder is crucial. It prevents mold and mildew. A dry bladder ensures safe and clean drinking water. Follow these steps to dry your Camelbak bladder effectively.
Air Drying Tips
Air drying is the best way to dry your Camelbak bladder. Here are some tips:
- Detach the bladder from the tube and mouthpiece.
- Hang the bladder upside down to let gravity help.
- Use a clean hanger or drying rack. Ensure it stays open.
- Place the bladder in a well-ventilated area. Fresh air speeds up drying.
- Use a fan to increase airflow if needed.
Always ensure the bladder is completely dry before storing it.
Avoiding Mold And Mildew
Mold and mildew can form if the bladder is not dried properly. To avoid this, follow these steps:
- Rinse the bladder with warm water and mild soap.
- Use a bottle brush to clean hard-to-reach areas.
- Ensure all soap is rinsed out completely.
- After air drying, use a clean towel to wipe any remaining moisture.
- Store the bladder in a cool, dry place. Avoid sealed containers.
Regularly check your bladder for any signs of mold or mildew.
Routine Maintenance
Routine maintenance of your Camelbak bladder is essential. It ensures your hydration system remains clean and safe to use. By following a simple routine, you can prevent mold and bacteria buildup.
Regular Cleaning Schedule
Clean your Camelbak bladder after each use. Rinse it with warm water and mild soap. Use a cleaning brush to reach all corners. Avoid harsh chemicals that can damage the bladder. Allow it to air dry completely before storing.
Storing The Bladder
Proper storage is crucial for maintaining a clean Camelbak bladder. Store it in a cool, dry place. Ensure it’s completely dry to prevent mold growth. For long-term storage, keep it in the freezer. This prevents bacteria and mold from growing.
Troubleshooting Common Problems
Cleaning a Camelbak bladder can sometimes lead to a few common issues. These problems can make your hydration pack less effective. Let’s look at how to solve them.
Lingering Odors
Lingering odors can be a nuisance. First, rinse the bladder with warm water. Add a tablespoon of baking soda and let it sit for a few hours. This helps neutralize smells. Rinse again with clean water. For stronger odors, use a mix of water and white vinegar. Let it soak overnight, then rinse thoroughly.
Stubborn Stains
Stains can be tough to remove. Fill the bladder with warm water and add a few drops of dish soap. Use a brush to scrub the inside. Pay extra attention to corners and crevices. Rinse well to remove all soap. If stains persist, try a mix of water and lemon juice. Let it soak for a few hours and then rinse.
Expert Tips For Prolonging Bladder Life
Maintaining your Camelbak bladder is crucial for ensuring it lasts a long time. A few expert tips can help you keep it clean and functioning well. Below are some practices to follow.
Avoiding Harsh Chemicals
Using harsh chemicals can damage your Camelbak bladder. Opt for mild soap and warm water instead. A gentle cleaning solution will prevent wear and tear. Avoid bleach and other strong cleaners as they can degrade the material.
Proper Storage Solutions
Proper storage can prolong the life of your Camelbak bladder. Make sure to dry it completely before storing. Mold and bacteria thrive in moisture. Use a hanger to keep the bladder open for drying. Store it in a cool, dry place.
Follow these expert tips to ensure your Camelbak bladder remains in top condition. Proper care and maintenance can extend its life, providing you with clean and safe hydration.
Frequently Asked Questions
How Often Should I Clean My Camelbak Bladder?
Clean your Camelbak bladder after each use. This prevents mold and bacteria.
What Tools Do I Need To Clean A Camelbak Bladder?
You need mild soap, water, a cleaning brush, and a drying rack.
Can I Put My Camelbak Bladder In The Dishwasher?
No, do not put your Camelbak bladder in the dishwasher. Hand wash only.
How Do I Dry A Camelbak Bladder Properly?
Use a drying rack or hang it upside down to air dry completely.
Is It Safe To Use Bleach To Clean Camelbak Bladder?
Yes, but use a very diluted bleach solution. Rinse thoroughly after cleaning.
Conclusion
Keeping your Camelbak bladder clean is essential for safe hydration. Regular cleaning prevents mold and bacteria buildup. Follow the steps mentioned to maintain your bladder. Use mild soap and warm water for best results. Dry it thoroughly after cleaning to avoid moisture.
A clean bladder ensures fresh-tasting water on every hike. Invest a little time in cleaning, and enjoy hassle-free hydration. Simple steps, big benefits. Stay hydrated and healthy!