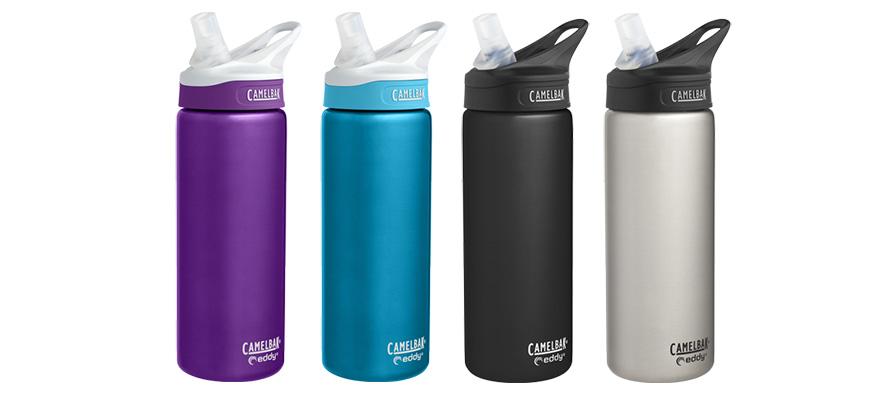
Table of Contents
Cleaning your Camelbak bite valve is crucial for maintaining its performance and hygiene. A dirty bite valve can harbor bacteria and affect the taste of your drink.
Keeping your Camelbak bite valve clean ensures fresh-tasting hydration during your adventures. Over time, dirt and residue can build up, leading to potential health risks. By regularly cleaning the bite valve, you can prevent these issues and enjoy a better drinking experience.
This guide will walk you through simple steps to clean your Camelbak bite valve effectively. Whether you’re an avid hiker, cyclist, or just someone who loves using a Camelbak, this information is vital. Stay hydrated and healthy by learning how to care for your Camelbak bite valve properly. Let’s dive into the cleaning process!
Gathering Supplies
Cleaning your Camelbak bite valve is essential for maintaining hygiene and ensuring a fresh taste. Before diving into the cleaning process, it’s important to gather all the necessary supplies. This will streamline the cleaning process and make it more efficient.
Required Cleaning Tools
To clean your Camelbak bite valve effectively, you will need a few basic tools. These tools are essential for removing dirt, grime, and bacteria from the valve:
- Warm Water: Essential for rinsing and soaking the bite valve.
- Mild Soap: Use a gentle dish soap to avoid any residue.
- Small Brush: A toothbrush works well for scrubbing.
- Paper Towels: For drying the bite valve after cleaning.
Optional Cleaning Aids
While the required tools are sufficient, you might find these additional aids helpful. These optional supplies can make the cleaning process quicker and more thorough:
- Cleaning Tablets: Special tablets designed for hydration systems. They help remove stubborn stains and odors.
- Pipe Cleaners: Useful for reaching tight spots inside the valve.
- Vinegar: A natural disinfectant that can be used for deep cleaning.
- Baking Soda: Helps in removing tough stains and neutralizing odors.
Disassembling The Bite Valve
Disassembling the Camelbak bite valve is essential for a thorough cleaning. It ensures you remove all dirt and bacteria from the valve. The process is simple and requires no special tools. Follow these steps to keep your hydration system clean and safe.
Removing The Valve
First, detach the bite valve from the drinking tube. Grasp the valve firmly and pull it off the tube. You might need to twist it slightly to loosen it. Be gentle to avoid damaging the valve or the tube.
Separating Components
Next, separate the bite valve into its individual parts. The valve usually consists of a silicone cover and a small plastic piece. Carefully pull apart these components. This step allows you to clean each part thoroughly.
Initial Rinse
Cleaning your Camelbak bite valve is essential for maintaining hygiene. The initial rinse is the first step. This process helps remove loose dirt and debris. Follow the steps below to ensure a thorough clean.
Using Warm Water
Start with warm water. Fill a bowl or sink with it. Warm water helps loosen any residue. It also kills some bacteria. Avoid hot water. Hot water can damage the valve.
Rinsing Each Part
Disassemble the bite valve. Separate the silicone cover from the plastic valve. Rinse each part under warm water. Make sure to rinse inside and out. Shake off excess water. Ensure all parts are clean. Let them dry on a clean towel.
Deep Cleaning
Keeping your Camelbak bite valve clean is crucial. It ensures you drink fresh, safe water. Deep cleaning the valve removes stubborn dirt and bacteria.
Applying Cleaning Solution
Fill a bowl with warm water. Add a few drops of mild dish soap. Submerge the bite valve in the soapy water. Let it soak for 5-10 minutes. This loosens the grime and kills germs.
Scrubbing With A Brush
Use a small brush to scrub the valve. A toothbrush works well. Focus on the inner parts. Scrub gently but thoroughly. Ensure all dirt and residue are removed. Rinse the valve under running water. Make sure no soap remains.
Rinsing And Drying
Keeping your Camelbak bite valve clean is essential for maintaining optimal hydration. After scrubbing and soaking, rinsing and drying the bite valve ensures no residue or moisture remains. This helps prevent mold and bacteria growth.
Final Rinse
After soaking, rinse the bite valve thoroughly with clean water. Hold it under the tap and let water flow through it. Use a soft brush for any stubborn spots. This ensures all soap and residue are gone.
Inspect the valve for any remaining debris. If necessary, repeat the rinsing process until you see no more dirt.
Air Drying Techniques
Once rinsed, shake off excess water from the bite valve. Place it on a clean, dry towel. Ensure it’s in a well-ventilated area. Proper air drying prevents moisture buildup, which can lead to mold.
Avoid direct sunlight. It can degrade the material over time. For faster drying, use a fan to circulate air around the valve.
Allow the bite valve to dry completely before reassembling it. This helps maintain the quality and longevity of the valve.
Reassembling The Bite Valve
After a thorough cleaning, reassembling the Camelbak bite valve is crucial. This ensures it works efficiently. The process involves reconnecting parts and ensuring each part fits properly.
Reconnecting Parts
Start by gathering all clean parts. This includes the bite valve, straw, and any other components.
- Insert the bite valve back into the straw.
- Make sure it clicks into place.
- Attach the straw to the hydration bladder.
Double-check that each part is securely connected. A loose connection might cause leaks.
Ensuring Proper Fit
Once all parts are reconnected, ensure they fit properly. This prevents future issues.
- Check the bite valve. It should be snug and firm.
- Inspect the straw. It should be straight and not bent.
- Look at the bladder connection. It should be tight and secure.
Test the assembly by taking a few sips. If water flows freely, everything is set.
Proper reassembly ensures your Camelbak remains in top condition. Enjoy a smooth and leak-free hydration experience.
Maintenance Tips
Maintaining your Camelbak bite valve is essential for hygiene and performance. A regular cleaning routine keeps bacteria and mold away. Proper storage practices also help extend the life of your bite valve. Follow these maintenance tips to ensure your Camelbak bite valve stays in top condition.
Regular Cleaning Schedule
Cleaning your Camelbak bite valve regularly prevents buildup of dirt and bacteria. Rinse the valve with warm water after each use. For a deeper clean, use mild soap and a soft brush weekly. Avoid harsh chemicals which can damage the valve. Let it dry completely before reassembling.
Storage Recommendations
Store your Camelbak bite valve in a clean, dry place. Keep it away from direct sunlight to prevent material degradation. Disassemble the valve if storing for a long period. This prevents any moisture from causing mold. Use a sealed container to keep it dust-free.
Frequently Asked Questions
How Often Should You Clean A Camelbak Bite Valve?
Clean the Camelbak bite valve after every use. Especially after using sugary drinks.
What Materials Do You Need To Clean A Camelbak Bite Valve?
You need warm water, mild soap, a small brush, and vinegar or baking soda.
Can You Put The Camelbak Bite Valve In The Dishwasher?
Yes, you can. Place it on the top rack for a safe wash.
How Do You Remove Mold From A Camelbak Bite Valve?
Soak the valve in a vinegar solution. Scrub gently with a small brush.
How Do You Dry A Camelbak Bite Valve After Cleaning?
Shake off excess water. Air dry by hanging or placing on a clean surface.
Conclusion
Keeping your Camelbak bite valve clean is easy and important. Follow these steps regularly. It will ensure your water stays fresh and hygienic. Clean your gear to enjoy every adventure safely. Remember, a clean bite valve enhances your hydration experience.
Simple cleaning tools and a few minutes can make a big difference. Stay hydrated, stay healthy, and keep your Camelbak in top shape. Happy trails!