Table of Contents
Cleaning a black stove top can seem tricky. It often shows stains and smudges.
This guide will show you how to clean it effectively. A black stove top looks sleek and modern in any kitchen. But keeping it spotless can be a challenge. Grease, food spills, and daily use can make it dirty quickly.
Regular cleaning helps maintain its shine and extends its life. This blog will teach you simple steps to clean your black stove top. You’ll learn what tools and cleaners to use, and tips to avoid scratches. By following these steps, you can keep your stove top looking new. So, let’s dive in and make your kitchen sparkle!
Preparing Your Stove
Before you start cleaning your black stove top, it’s essential to prepare. Proper preparation ensures that the cleaning process is smooth and efficient. Taking a few minutes to gather supplies and follow safety precautions can save you time and effort later.
Gathering Supplies
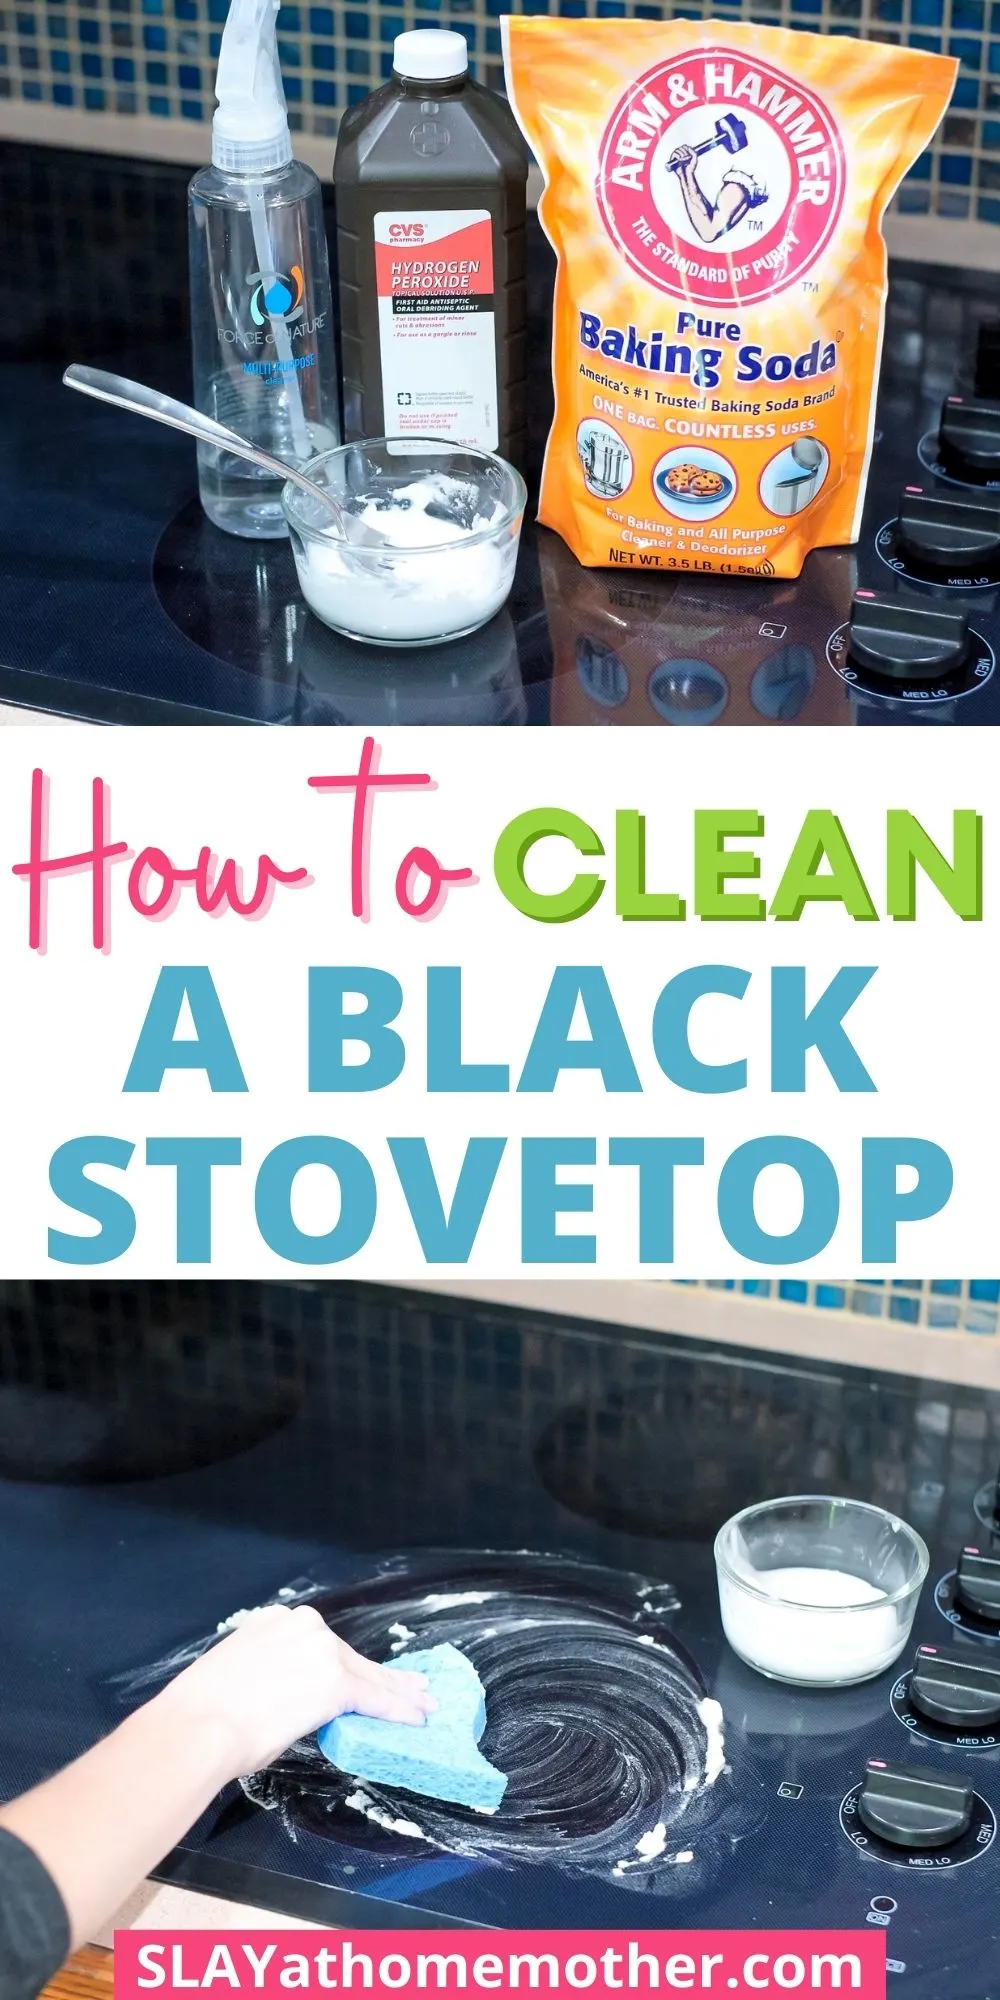
First, gather all the necessary cleaning supplies. You’ll need a soft cloth or sponge, a gentle cleaner, and a bowl of warm water. For stubborn stains, have baking soda and vinegar on hand. Avoid abrasive scrubbers as they can scratch the surface.
Safety Precautions
Unplug the stove and let it cool down completely. This prevents accidental burns. Wear gloves to protect your hands from cleaning chemicals. Make sure the area is well-ventilated. Open a window or use an exhaust fan.
Daily Maintenance
Daily maintenance of your black stove top is essential. It keeps the surface clean and shiny. A clean stove top also prevents buildup of grime. This makes deep cleaning less frequent. Regular attention can save you time and effort.
Quick Wipe Down
After cooking, allow the stove top to cool. Then, use a damp cloth to wipe away spills. This prevents stains from setting. A quick wipe down keeps the surface looking new. Make this a part of your routine.
Choosing The Right Cloth
Use a soft microfiber cloth for daily cleaning. It won’t scratch the surface. Microfiber cloths are gentle yet effective. They pick up dust and grease easily. Avoid using abrasive materials. They can damage the finish of your stove top.
Deep Cleaning Process
Cleaning a black stove top can seem daunting. But with the right steps, it becomes easier. This deep cleaning process will ensure your stove top looks brand new. Let’s dive into the detailed steps to achieve that sparkling clean finish.
Removing Grates And Burners
First, remove the grates and burners from your stove top. This step is essential for a thorough clean. Place them in a sink filled with warm, soapy water. Let them soak for about 10-15 minutes. This helps to loosen any grime or grease.
Use a non-abrasive scrubber to clean the grates and burners. Gently scrub away any stubborn spots. Rinse them well and let them air dry. Ensuring they are completely dry before placing them back is important.
Scrubbing The Surface
While the grates and burners soak, focus on the stove top surface. Use a damp cloth to wipe away any loose debris or crumbs. For a deeper clean, mix a solution of equal parts vinegar and water.
Spray the solution generously over the stove top. Let it sit for a few minutes. This helps to break down the grease and stains. Use a soft sponge or cloth to scrub the surface. Pay special attention to areas around the burners and any visible stains.
For tougher spots, sprinkle some baking soda on the surface. Then, spray the vinegar solution over it. This will create a fizzing reaction that helps to lift the grime. Gently scrub with a sponge until the stains are gone.
Finally, wipe down the stove top with a clean, damp cloth. Make sure to remove all residue from the cleaning solutions. Dry the surface with a soft towel to avoid water spots.
Now, your black stove top should look as good as new! Repeat this deep cleaning process regularly to maintain its shine and functionality.
Handling Tough Stains
Cleaning a black stove top can be challenging, especially with tough stains. These stubborn spots can make your stove look old and dirty. But, with the right methods, you can handle tough stains effectively. Two effective solutions are using baking soda and a vinegar solution.
Using Baking Soda
Baking soda is a natural cleaner. It is gentle yet powerful. Sprinkle baking soda on the stain. Let it sit for a few minutes. This will help loosen the grime. Use a damp cloth or sponge to scrub the area. Rinse with water and dry with a clean towel. Your stove will look clean and shiny.
Vinegar Solution
Vinegar is an excellent cleaner. It cuts through grease and grime. Mix equal parts of vinegar and water in a spray bottle. Spray the solution on the stain. Let it sit for a few minutes. The acid in the vinegar will break down the stain. Wipe the area with a damp cloth. Rinse and dry with a clean towel.
Cleaning Burners And Grates
Cleaning burners and grates is a crucial step to keep your black stove top sparkling. Burners and grates collect a lot of grease and food particles. Keeping them clean ensures your stove works efficiently and looks great.
Soaking In Soapy Water
Remove the burners and grates from the stove. Fill your sink with warm, soapy water. Submerge the burners and grates in the soapy water. Let them soak for at least 20 minutes. This will loosen any stuck-on grease and food particles.
Scrubbing With A Brush
After soaking, take a scrub brush or an old toothbrush. Gently scrub the burners and grates. Focus on areas with stubborn grime. Use circular motions for better results. Make sure to scrub all sides. Rinse them thoroughly with clean water. Dry them completely before placing them back on the stove.
Polishing For A Sparkling Finish
Shine your black stove top by using a gentle cleaner and a soft cloth. Remove dirt and grease with ease. Enjoy a sparkling kitchen every day.
Cleaning your black stove top is just the beginning. To achieve a truly sparkling finish, polishing is essential. This step ensures your stove looks shiny and new. Let’s explore two simple methods to polish your black stove top effectively.
Using A Glass Cleaner
Spray a small amount of glass cleaner on the stove top. Make sure to cover all areas lightly. Allow the cleaner to sit for a minute. This helps in breaking down any remaining grime or streaks.
Buffing With A Microfiber Cloth
Take a clean microfiber cloth. Buff the stove top in circular motions. This helps to remove any residue and leaves a shiny surface. Keep buffing until the stove top sparkles.
Polishing your black stove top makes a big difference. It not only looks good but also helps maintain the stove’s condition. A little extra effort goes a long way.
“`
Preventing Future Stains
Cleaning a black stove top can be a tedious task. Preventing future stains can save you a lot of time and effort. By taking some simple steps, you can keep your stove looking new for longer. Here are some tips and tricks to help you maintain a spotless stove top.
Using Stove Covers
Stove covers are an excellent way to protect your stove top. They act as a barrier against spills and splatters.
- Silicone covers are heat-resistant and easy to clean.
- Aluminum covers are disposable and great for frequent cooks.
- Custom-fit covers provide full coverage and a seamless look.
Using covers can drastically reduce the amount of cleaning needed. Simply remove and wash or replace them as needed.
Regular Maintenance Tips
Regular maintenance is key to preventing stains. Follow these simple tips:
- Wipe down the stove top after each use. This prevents food and grease from building up.
- Use a mild detergent and a soft cloth for daily cleaning. Avoid abrasive sponges.
- Deep clean once a week. Use a stove top cleaner and a non-scratch scrubber.
- Check burner grates and clean them monthly. Soak in warm, soapy water for best results.
- Inspect gas burners for clogs. Use a toothpick to remove any debris.
These simple steps can keep your stove top looking pristine and prevent stubborn stains from forming.
Common Mistakes To Avoid
Cleaning a black stove top can be a challenging task. Many people make common mistakes that can lead to damage or less effective cleaning. To ensure your stove top remains pristine, it’s important to understand what to avoid.
Using Abrasive Cleaners
Using abrasive cleaners is a big mistake. These cleaners can scratch the surface of your black stove top. Scratches make the stove look worn and can trap dirt. Instead, use a soft cloth with a gentle cleaner.
Here is a simple table to show the difference:
| Cleaner Type | Effect on Stove Top |
|---|---|
| Abrasive Cleaner | Scratches and damages the surface |
| Gentle Cleaner | Protects and cleans effectively |
Ignoring Spills
Ignoring spills is another common mistake. Spills that sit for too long can harden and become difficult to remove. Always clean spills as soon as they happen. This keeps your stove top clean and prevents tough stains.
Follow these simple steps to clean spills immediately:
- Turn off the stove and let it cool.
- Use a damp cloth to wipe the spill.
- Apply a gentle cleaner if needed.
- Dry with a soft towel.
By avoiding these common mistakes, you can keep your black stove top looking new and clean. Remember, using the right cleaner and addressing spills quickly are key to maintaining your stove top.
Frequently Asked Questions
How Do You Clean A Black Stove Top?
Use a mixture of baking soda and water. Gently scrub with a soft sponge.
Can Vinegar Clean A Black Stove Top?
Yes, vinegar is effective. Spray it on the stove top and wipe clean with a cloth.
Is It Safe To Use Bleach On A Black Stove Top?
Avoid bleach. It can damage the stove top’s finish. Use mild cleaners instead.
What Is The Best Cleaner For Black Stove Tops?
Mild dish soap and water work well. For tougher stains, try a baking soda paste.
How Often Should You Clean A Black Stove Top?
Clean after each use to prevent buildup. Deep clean weekly for best results.
Conclusion
A clean black stove top enhances your kitchen’s look. Regular cleaning prevents stubborn stains. Use gentle, effective cleaners. Follow simple steps for best results. Wipe spills immediately to avoid buildup. A clean stove top also extends its lifespan. Happy cleaning!