Table of Contents
Cleaning your Culligan water cooler is essential. It ensures fresh, clean water every time.
A clean water cooler prevents bacteria and mineral buildup. Regular maintenance keeps your water tasting great and your cooler running smoothly. In this guide, we will walk you through simple steps to clean your Culligan water cooler effectively. Whether you’re at home or in the office, these tips will help you maintain a healthy drinking environment.
Let’s get started and make sure your cooler stays in top condition.
Preparation
Before you start cleaning your Culligan water cooler, it’s important to prepare properly. This ensures safety and efficiency. Follow these steps to get ready for the cleaning process.
Gather Supplies
- Soft cloth or sponge
- Dish soap
- White vinegar or bleach
- Bucket or large container
- Clean, dry towels
- Gloves (optional)
Having all the necessary supplies at hand will make the process smoother. Use a soft cloth or sponge to avoid scratching the cooler. Dish soap and white vinegar or bleach are effective for cleaning and disinfecting. A bucket or large container will be needed to hold water and cleaning solutions. Clean, dry towels are essential for drying the cooler after cleaning. Wearing gloves is optional but can protect your hands from cleaning agents.
Turn Off And Unplug
Before you start cleaning, always turn off and unplug the water cooler. This is crucial for safety. Unplugging the cooler prevents any risk of electrical shock. Ensure the cooler is completely off before proceeding. It is also a good idea to move the cooler to an area where it is easy to clean and where any spills can be managed.
Disassemble The Cooler
Cleaning your Culligan water cooler starts with disassembling it. This step is crucial. It ensures every part gets cleaned properly. Follow these steps to safely disassemble your cooler.
Remove Water Bottle
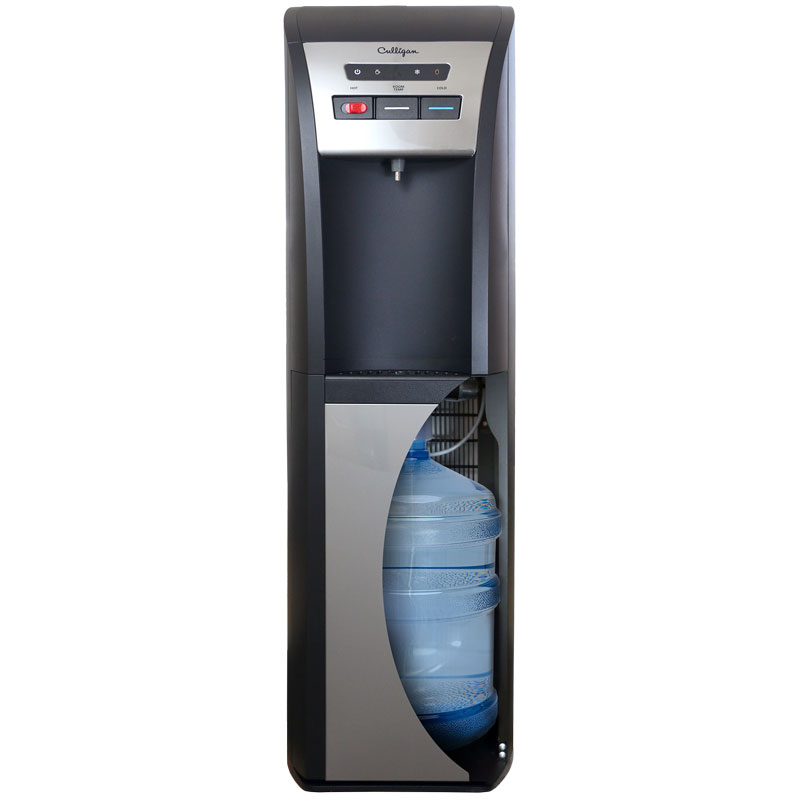
Start by removing the water bottle. Make sure the cooler is unplugged first. Lift the bottle straight up. Be careful not to spill any water. Set the bottle aside in a safe place.
Detach Reservoir
Next, detach the reservoir. Locate the screws or clips holding it in place. Use a screwdriver if needed. Gently lift the reservoir out of the cooler. Keep it upright to avoid spilling water. Place the reservoir on a clean surface.
Clean The Exterior
Keeping the exterior of your Culligan water cooler clean is crucial. It prevents dust and grime buildup. A clean exterior also enhances the look of your cooler. Let’s explore the steps to clean the outside surfaces effectively.
Wipe Down Surfaces
First, unplug the water cooler to ensure safety. Use a soft cloth dampened with mild soap and water. Gently wipe the exterior surfaces, including the top, sides, and back. Pay special attention to areas with visible dirt or stains.
For stubborn spots, a bit of baking soda on the cloth can help. Avoid using harsh chemicals that may damage the cooler’s finish. Once done, dry the surfaces with a clean, soft towel.
Clean Drip Tray
The drip tray collects excess water and can become dirty over time. Remove the drip tray by gently pulling it out. Empty any water and debris collected inside.
Wash the tray with warm, soapy water. Use a sponge or brush to scrub away any residue. Rinse thoroughly and dry with a towel before placing it back.
Regular cleaning of the drip tray helps maintain the cooler’s hygiene and prevents bacteria growth.
Sanitize The Reservoir
Keeping your Culligan water cooler clean is essential for safe drinking water. One key step is to sanitize the reservoir. This process ensures that bacteria and other contaminants are removed. Follow these simple steps to keep your water cooler fresh and clean.
Prepare Cleaning Solution
First, prepare a cleaning solution. Mix one tablespoon of unscented bleach with one gallon of water. This mixture will effectively kill germs. Ensure you use fresh, clean water for this solution.
Scrub Inside
Next, scrub the inside of the reservoir. Use a clean, soft brush or sponge. Dip it in the cleaning solution. Gently scrub all surfaces. Make sure to reach all corners and crevices. This step removes dirt and buildup.
After scrubbing, rinse the reservoir thoroughly. Use clean water to remove any remaining bleach. Proper rinsing is crucial. It ensures no bleach residue remains. Now, your reservoir is sanitized and ready for use.
Flush The System
Maintaining your Culligan water cooler involves a key step: Flushing the System. This ensures clean and safe drinking water. Let’s break it down into simple steps.
Rinse With Water
Begin by turning off the water cooler. Unplug the unit for safety. Remove the water bottle and any remaining water from the reservoir. You might need a bowl to catch excess water.
Next, fill the reservoir with warm water. Use a clean container for this. Swirl the water around to rinse the reservoir. Empty the water from the cooler. Repeat this process two more times. This step removes loose debris and initial contaminants.
Run Cleaning Solution
Now, it’s time to use a cleaning solution. Create a mixture of water and white vinegar. Use one part vinegar to three parts water. This solution disinfects the cooler.
Pour the solution into the reservoir. Let it sit for five minutes. This allows the solution to kill bacteria. Run the solution through the spigots. Let it drain completely.
Rinse the reservoir again with clean water. This removes any vinegar taste. Run water through the spigots to clear them of the solution. Your cooler is now clean and ready for use.
Clean The Faucets
Cleaning the faucets of your Culligan water cooler is crucial. It helps to ensure clean and safe drinking water. Follow these steps to keep your water cooler in top condition.
Disassemble Faucets
- Turn off and unplug the water cooler.
- Remove the water bottle from the cooler.
- Locate the faucets. They are usually at the front.
- Gently twist and pull each faucet to remove it.
- Set the disassembled parts aside for cleaning.
Scrub And Rinse
- Fill a basin with warm water and mild dish soap.
- Place the faucet parts in the soapy water.
- Use a small brush to scrub the faucets thoroughly.
- Rinse each part with clean water to remove soap residue.
- Dry the parts with a clean towel or let them air dry.
Once dry, reassemble the faucets. Twist them back into place firmly. Plug in the water cooler and place the water bottle back on. Your faucets are now clean and ready for use.
Reassemble The Cooler
Clean the Culligan water cooler by carefully reassembling all the cleaned parts. Ensure each piece fits securely for proper function.
Once the cleaning process is complete, it’s time to reassemble your Culligan water cooler. This step is crucial to ensure your cooler functions properly and provides clean water. Follow these simple steps to put everything back together.
Reattach Reservoir
First, reattach the reservoir. Make sure it is clean and dry. Place the reservoir back into its slot. Ensure it fits snugly without any gaps. This helps prevent leaks. Double-check the alignment for a secure fit.
Replace Water Bottle
Next, replace the water bottle. Remove the cap from the new bottle. Carefully lift the bottle and position it above the reservoir. Quickly flip the bottle and place it onto the cooler. Ensure it is steady and secure. This prevents spills and ensures a proper water flow.
By following these steps, you can ensure your Culligan water cooler is reassembled correctly and ready for use.
“`
Final Steps
Completing the cleaning process of your Culligan water cooler requires some final steps. These steps ensure your cooler is ready for safe and efficient use. Follow them to finish the job properly.
Plug In And Turn On
First, plug your Culligan water cooler back into the wall outlet. Make sure the power cord is securely connected. Now, turn on the cooler using the power switch. This will activate the cooling and heating functions.
Test Water Flow
Next, test the water flow from both the cold and hot water taps. Press the cold water tap and let the water run for a few seconds. Then, do the same with the hot water tap. This ensures there are no air bubbles or blockages in the system.
If you notice any issues, double-check that all parts are correctly assembled. You might need to repeat some cleaning steps if the problem persists.
| Step | Action |
|---|---|
| 1 | Plug in the cooler |
| 2 | Turn on the power switch |
| 3 | Test the cold water tap |
| 4 | Test the hot water tap |
After testing, your Culligan water cooler should be ready for use. Enjoy clean, fresh water anytime you need it.
Frequently Asked Questions
How Often Should I Clean My Culligan Water Cooler?
Clean your Culligan water cooler every 6 months. This helps maintain clean, fresh water.
What Supplies Do I Need To Clean A Culligan Water Cooler?
You need mild dish soap, white vinegar, clean cloths, and a scrub brush. Simple items.
Can I Use Bleach To Clean My Culligan Water Cooler?
No, avoid bleach. Use white vinegar and mild dish soap. It’s safer and effective.
How Do I Sanitize The Water Reservoir?
Empty the reservoir, then scrub with white vinegar. Rinse well with clean water.
Do I Need To Unplug My Water Cooler Before Cleaning?
Yes, always unplug your water cooler before cleaning. It ensures safety during the process.
Conclusion
Keeping your Culligan water cooler clean is vital for your health. Regular cleaning helps ensure fresh, tasty water. Follow the steps outlined to maintain your cooler. It’s easy and quick. A clean cooler means fewer germs. Enjoy pure water every day.
Happy cleaning and stay hydrated!